

While the Polarion API was already powerful, you always had to go with classic wiki pages or java extensions in order to create something interactive that could create data in Polarion. With the new Polarion REST API it’s as easy as ever, to create your own interactive reports, form extensions, integrations and more!
In this post I want to introduce you into the basics of how you can use the Polarion REST API at the example of a form extension that allows to create linked tasks directly inside of a work item:
You’ll find the full code example in the chapter „Combining and making it look nice“.
We’ll go trough the following steps:
- Creating a Form Extension
- Creating the Front-End
- Enabling the REST API
- Using REST API
- Combining and making it look nice
Creating a Form Extension
Since version 22R2 the Velocity form extension is part of the Polarion core product, which allows us to create form extensions using Velocity very easily. This is also possible before Version 22R2. To see how and find another example, check this post: Creating form extensions with Velocity
To create a Velocity form extension we simply create a „.vm“ file in the „[Polarion_Install]/scripts“ folder. I’ll call the file „createWorkItem_FormExtension.vm“.

This file will contain the code. To test this out, I simply add „test“ into the file.
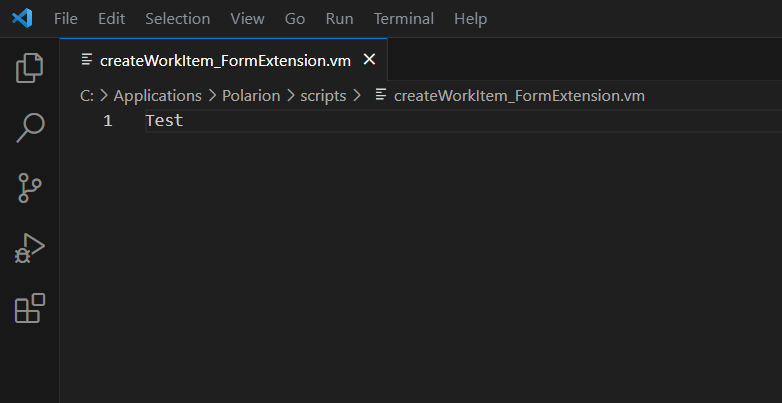
Tip: I recommend using Visual Studio Code with the Velocity syntax highlighting extension.
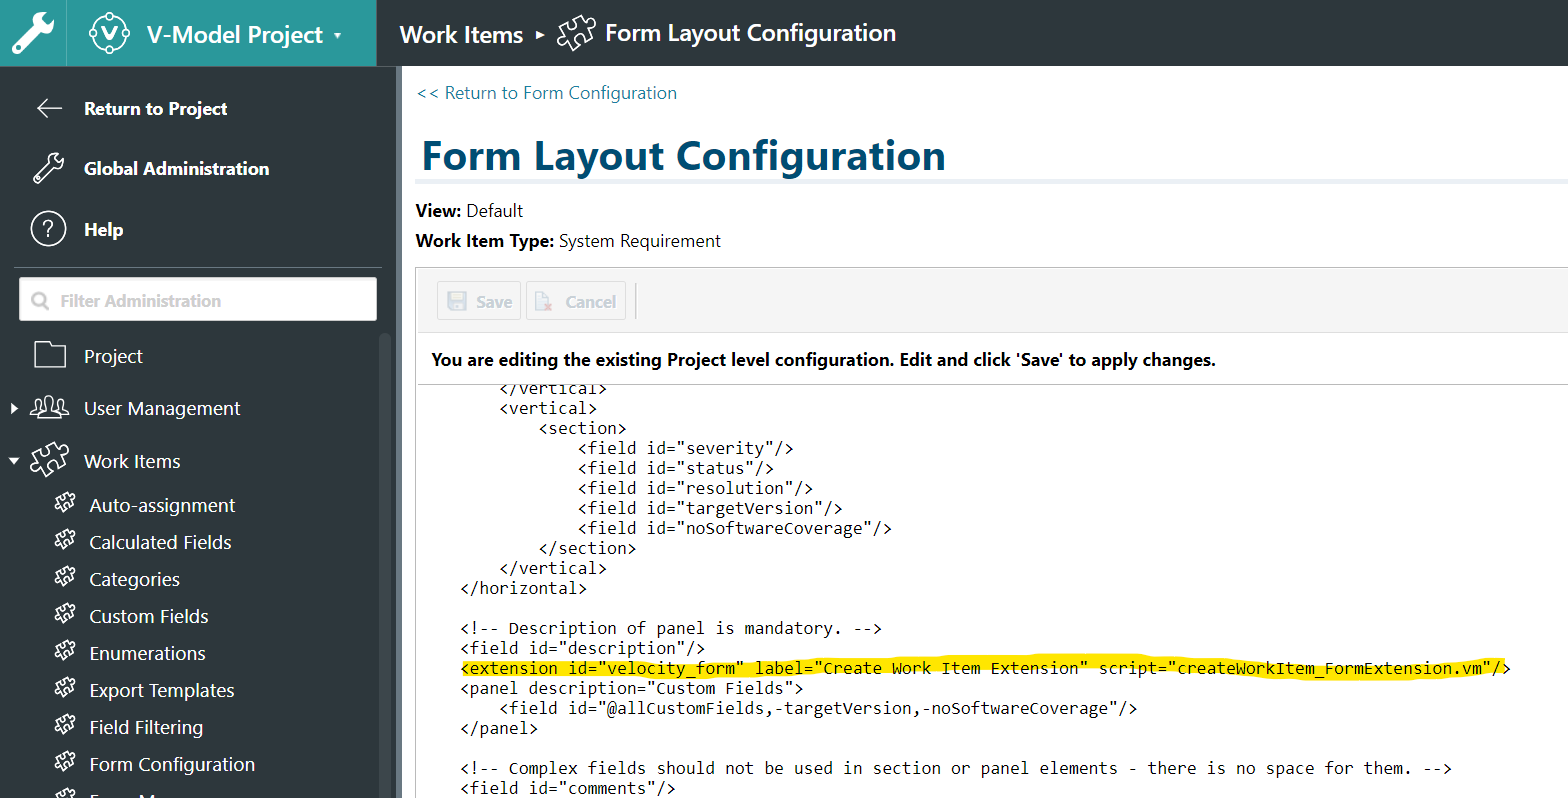
Then you have to add this to your form configuration:
<extension id="velocity_form" label="Create Work Item Extension" script="createWorkItem_FormExtension.vm"/>
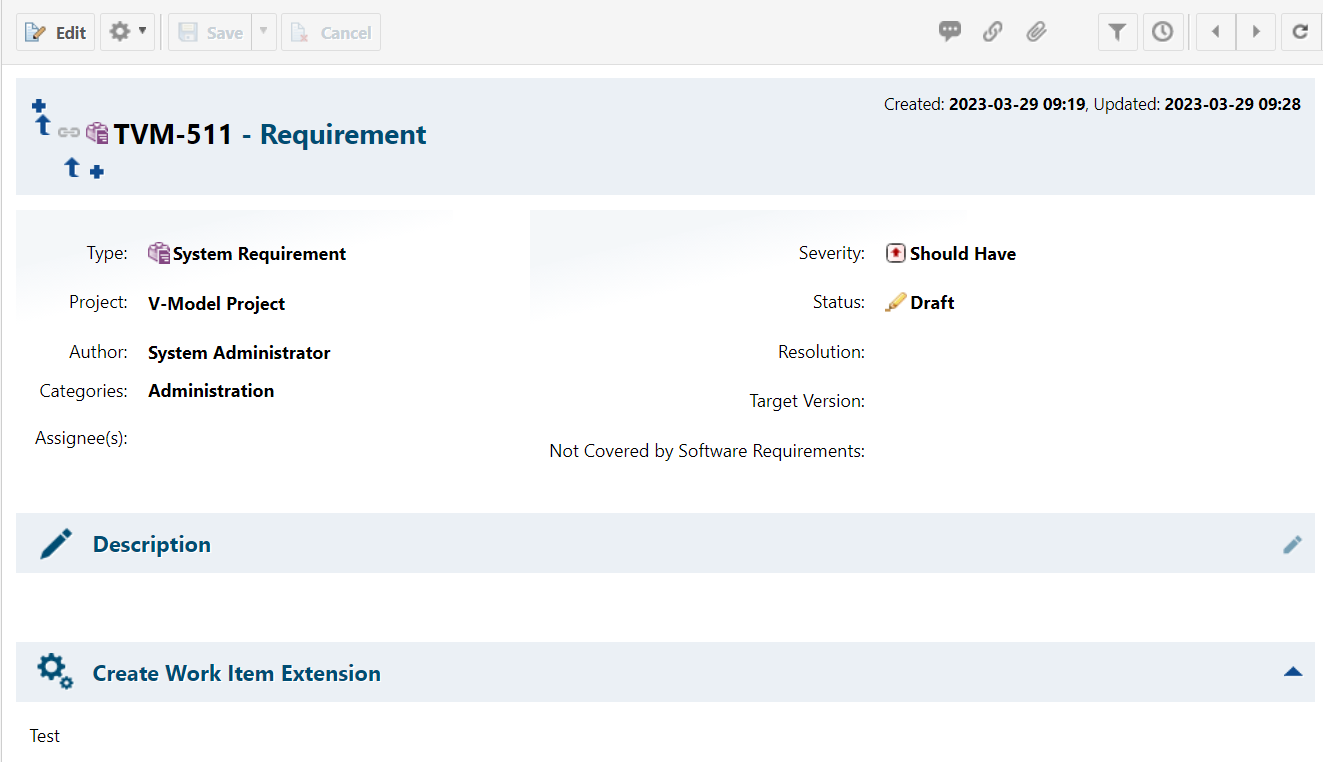
If you now go to your work item, you shall see the form extension:
Creating the Front-End
Now we want to make it look nice. We start with rendering all linked tasks in a table. For this we use Velocity. The currently opened work item is accessible via the $object variable. To get all linked work items from type task, we shall use SQL, because it’s much quicker than using velocity and iterating over linked work items. Additionally I added a little bit of CSS, so that the table looks fine. Finally we add a row with some input fields for title and description and a button that we can then use to create a new work item. I did it all in one step and provide you the code here. The only line you might have to adapt to your project configuration is line 41.
<style>
    /* Style for the table */
    .niceTable {
      width: 100%;
      border-collapse: collapse;
      border: 1px solid #ddd;
    }

    /* Style for table headers */
    .niceTh {
      background-color: #f2f2f2;
      color: #333;
      font-weight: bold;
      padding: 8px;
      border: 1px solid #ddd;
    }

    /* Style for table cells */
    .niceTd {
      padding: 8px;
      border: 1px solid #ddd;
      text-align: center;
    }

    /* Alternate row colors for better readability */
    niceTr:nth-child(even) {
      background-color: #f2f2f2;
      text-align: center;
    }

    /* Hover effect on rows */
    niceTr:hover {
      background-color: #ddd;
    }
</style>


## Current Work Item and Configuration
#set($workItemId = $object.getId())
#set($projectId = $object.getProjectId())
#set($taskWorkItemType = "task")
#set($renderingWorkItem = $transaction.workItems().getBy().oldApiObject($object))

## Define the SQL Query to get all linked tasks
#set($linkedWorkItemsQuery = "SQL:(select WORKITEM.C_URI from WORKITEM inner join PROJECT on PROJECT.C_URI = WORKITEM.FK_URI_PROJECT inner join STRUCT_WORKITEM_LINKEDWORKITEMS as SWL on WORKITEM.C_URI = SWL.FK_URI_P_WORKITEM inner join WORKITEM as WORKITEM2 on WORKITEM2.C_URI = SWL.FK_WORKITEM where PROJECT.C_ID = '$projectId' AND WORKITEM.C_TYPE = 'task' AND WORKITEM2.C_ID = '$workItemId')")
#set($linkedTasks = $trackerService.queryWorkItems($linkedWorkItemsQuery, "created"))

<div class="table-wrapper">
<table id="subTaskTable" class="niceTable">
	<tr class="niceTr">
		<th class="niceTh">ID</th>
		<th class="niceTh">Title</th>
        <th class="niceTh">Description</th>
		<th class="niceTh">Status</th>
    <th class="niceTh">Action</th>
	</tr>
#foreach($linkedWorkItem in $linkedTasks)
    <tr class="niceTr">
		<td class="niceTd">$!linkedWorkItem.getId()</td>
		<td class="niceTd">$!linkedWorkItem.getTitle()</td>
        <td class="niceTd">$transaction.workItems().getBy().oldApiObject($linkedWorkItem).fields().description().render().htmlFor().forFrame()</td>
		<td class="niceTd">$!linkedWorkItem.getStatus().getName()</td>
        <td class="niceTd">Already Existing</td>
	</tr>
#end
    <tr class="niceTr">
		<td class="niceTd">-</td>
		<td class="niceTd"><input type="text" id="inputFieldTitle" placeholder="Enter a Title..." /></td>
        <td class="niceTd"><input type="text" id="inputFieldDescription" placeholder="Enter a Description..." /></td>
		<td class="niceTd">-</td>
        <td class="niceTd"><button>Create Task</button></td>
	</tr>
</table>
</div>
This is just to prepare what this post really want’s to show: How to use the REST API to create a new task work item.
Enabling the REST API
Before we can use the REST API inside of Polarion, we have to set some properties (in [Polarion_Install]/polarion/configuration/polarion.properties).
The REST API is disabled by default and can be enabled by setting the „com.siemens.polarion.rest.enabled=true“. See also: Enable REST API
Then we have to enable the X-Polarion-Rest-Token, which allows us to get a one time token everytime we load a page. This is needed for „internal“ REST API applications. E.g. in report pages or form extensions. It allows us to get a token via: window.getRestApiToken(). We can do this by setting the following property: „com.siemens.polarion.rest.security.restApiToken.enabled=true“. See also:
Admin & User Guide: Rest Token
Restart the Polarion service and we’re ready to go.
Using REST API
I’m not really an expert in REST API’s and you’re better of to get general information about REST API’s somewhere else. I will explain how the Polarion REST API can be used in an example and also where to find the relevant resources.
So let’s start with the official documentation: You can find the Polarion SDK on any Polarion under: [Polarion_URL]/polarion/sdk/index.html. or under: https://testdrive.polarion.com/polarion/sdk/index.html
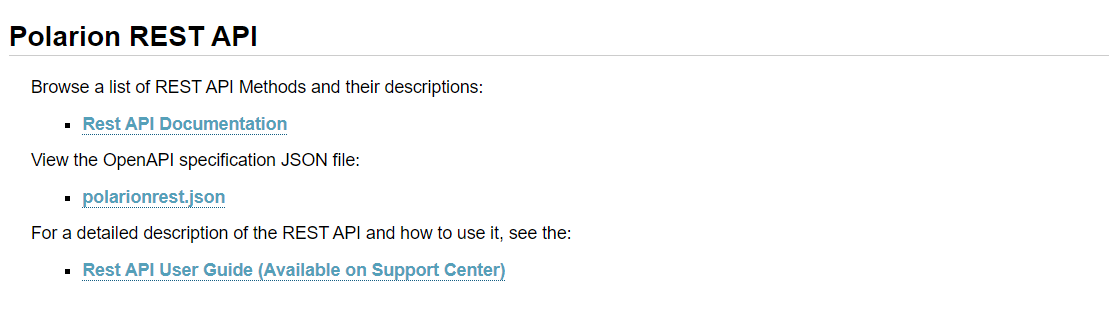
- REST API Documentation: Contains all the endpoints, methods and some descriptions.
- polarionrest.json: Machine-readable representation of the REST API documentation
- REST API User Guide: Here you can find a more detailed explanation on how to use the REST API.
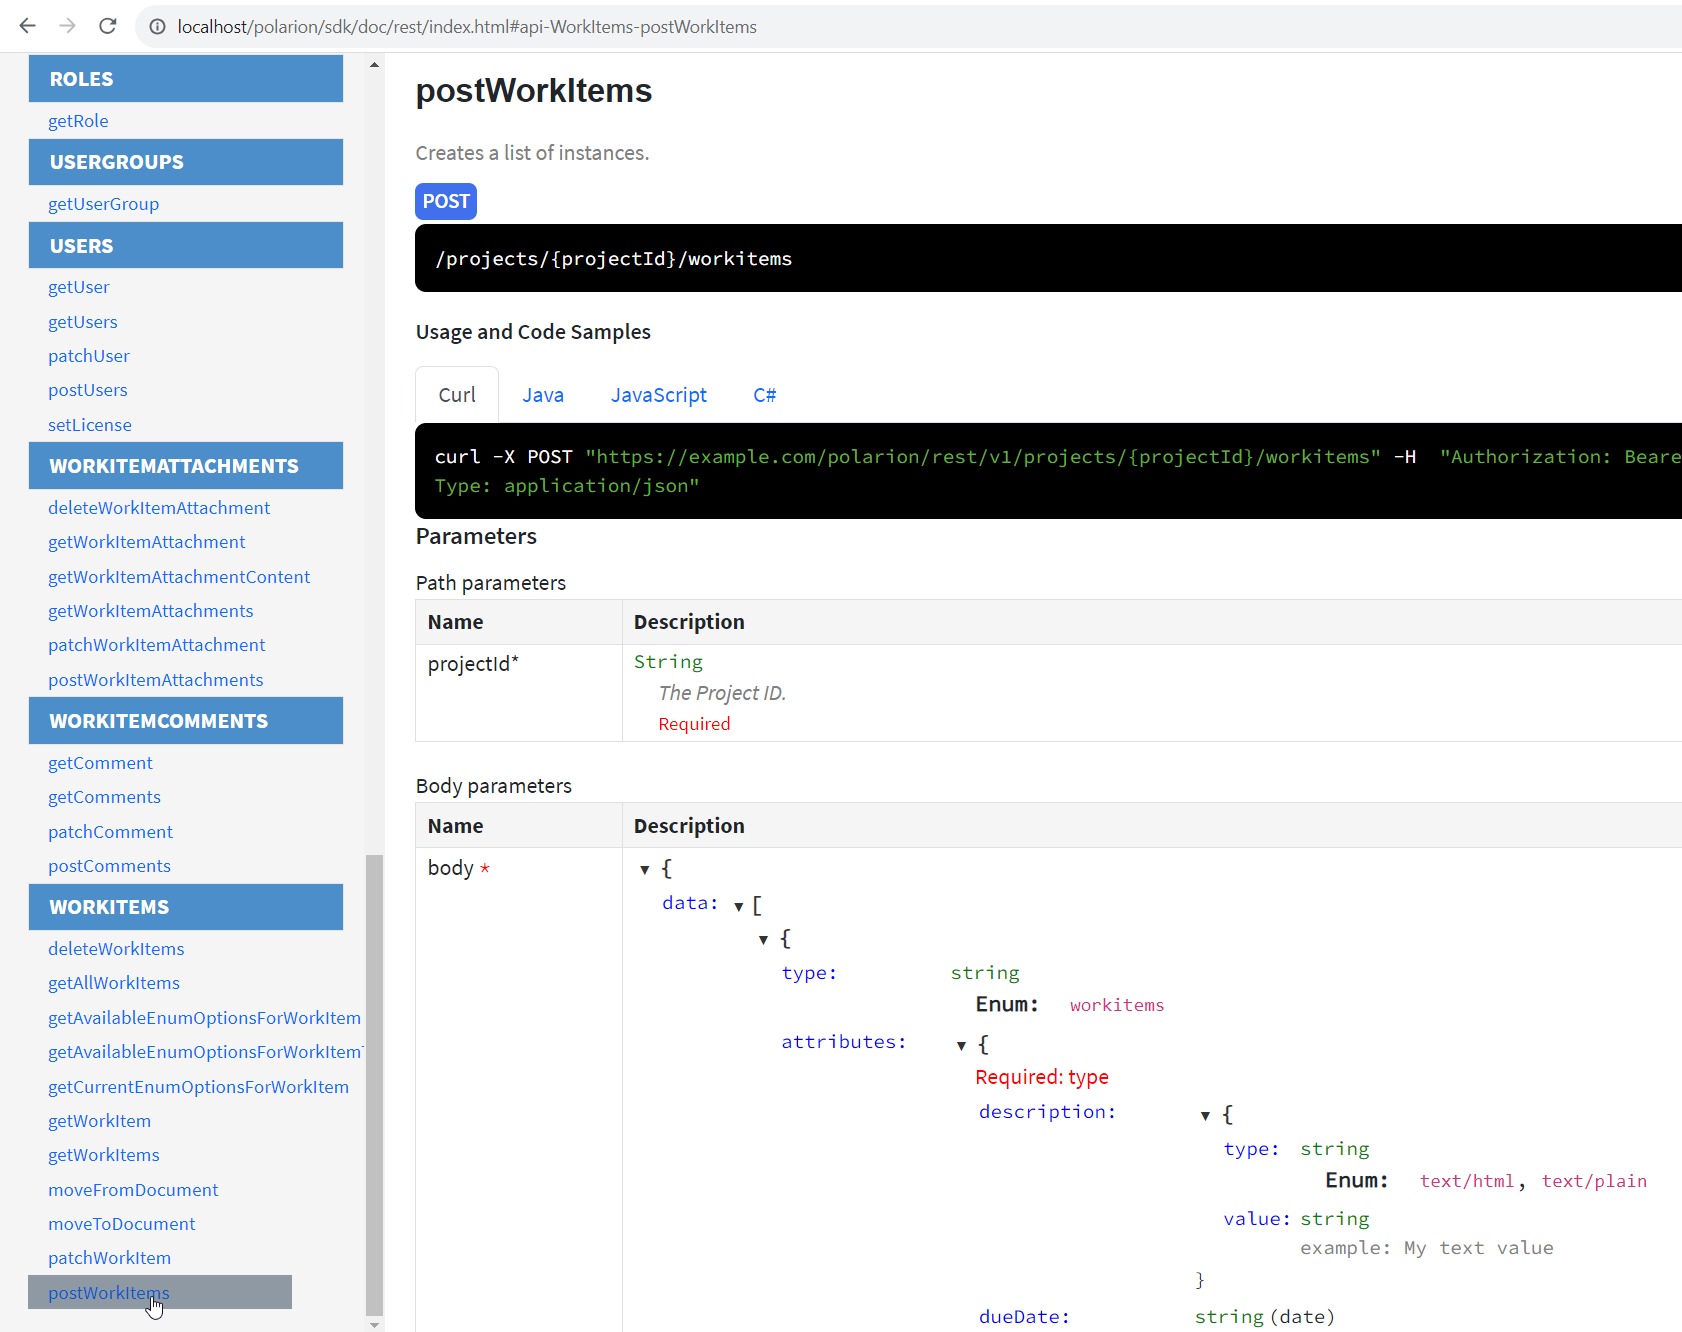
We’ll now go into the REST API Documentation and search for the endpoint that we need to create a work item.
There are usually 4 different kinds of http methods available in this REST API. Most are self-explaining like GET, PATCH and DELETE, but here a quick overview for what they are generally used for (there are overlaps and it’s more complicated):
- GET: To retrieve data.
- POST: To create data e.g. work items.
- PATCH: To update data.
- DELETE: To delete data.
We need to create a POST request and therefore we navigate to the „postWorkItems“ documentation.
Because we want to use it directly in our form extension, we’ll use Javascript. The documentation offers an example syntax:
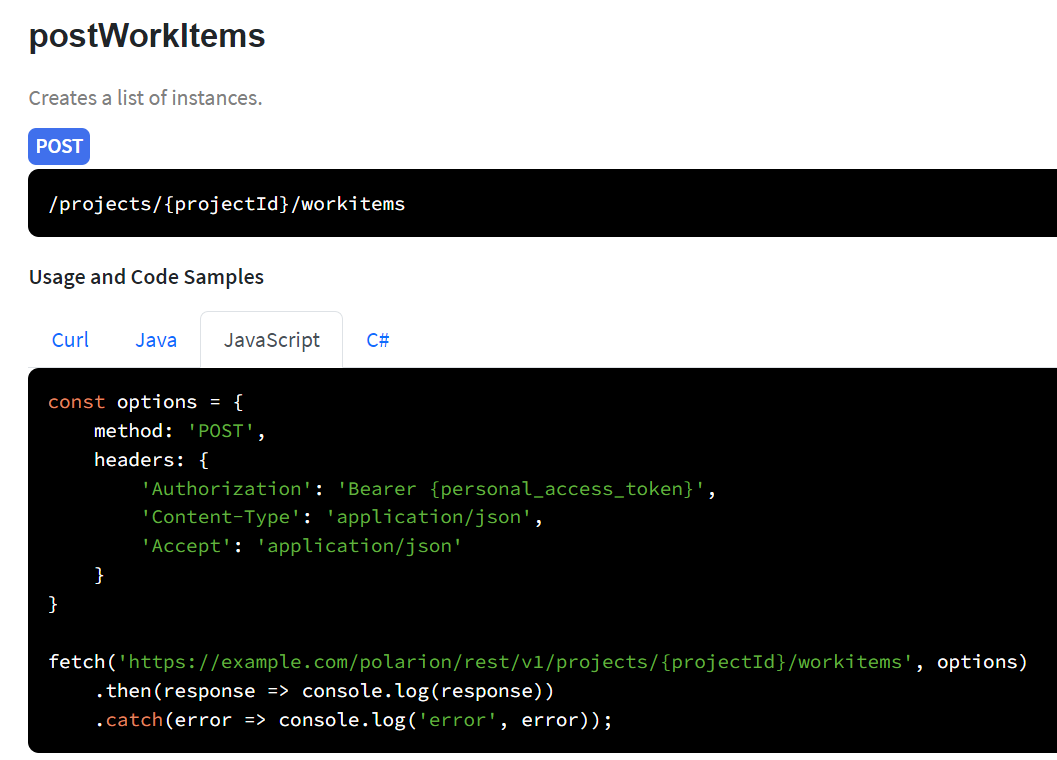
Here we can see, that we can simply use the fetch API, which is supported by most browsers. We have to provide two parameters:
- URL: of the REST API endpoint
- Options: containing the following (and more)
- Method: e.g. „POST“
- Headers: e.g. Authorization & formats
- Body: e.g. work item data as JSON (stringified)
Creating the „createWorkItem()“ function
Enough theory, let’s see how a function to create a work item looks like. I will go through the creation step by step to explain it. You can get the full code at the bottom of the post. First we’ll start by creating an async function, because fetch() is asynchronous. And we’ll add the function as „onclick“ to our „Create Task Button“.
<script>
 async function createWorkItem(){

 }
</script>

<td class="niceTd" onclick="createWorkItem()"><button>Create Task</button></td>
Now we’ll create the 2 parameters: url and options. Here we have the first challenge: How do we get the projectId of our current project in the client side javascript?

Simple: we can transfer variables from Velocity (server-side executed during loading of the page) to the Javascript part (Client-Side).
#set($workItemTitle = $object.getTitle())
#set($projectId = $object.getProjectId())

<script>
 var contextWorkItemId = "$workItemId";
 var projectId = "$projectId";
 async function createWorkItem(){

 }
</script>

<td class="niceTd" onclick="createWorkItem()"><button>Create Task</button></td>
This allows us to create the url:
#set($workItemTitle = $object.getTitle())
#set($projectId = $object.getProjectId())

<script>
 var contextWorkItemId = "$workItemId";
 var projectId = "$projectId";

 async function createWorkItem(){
  const url = 'http://localhost/polarion/rest/v1/projects/' + projectId + '/workitems';
 }
</script>

<td class="niceTd" onclick="createWorkItem()"><button>Create Task</button></td>
Now we have to create the options parameter, which includes the „body“ with the „type“ as required:
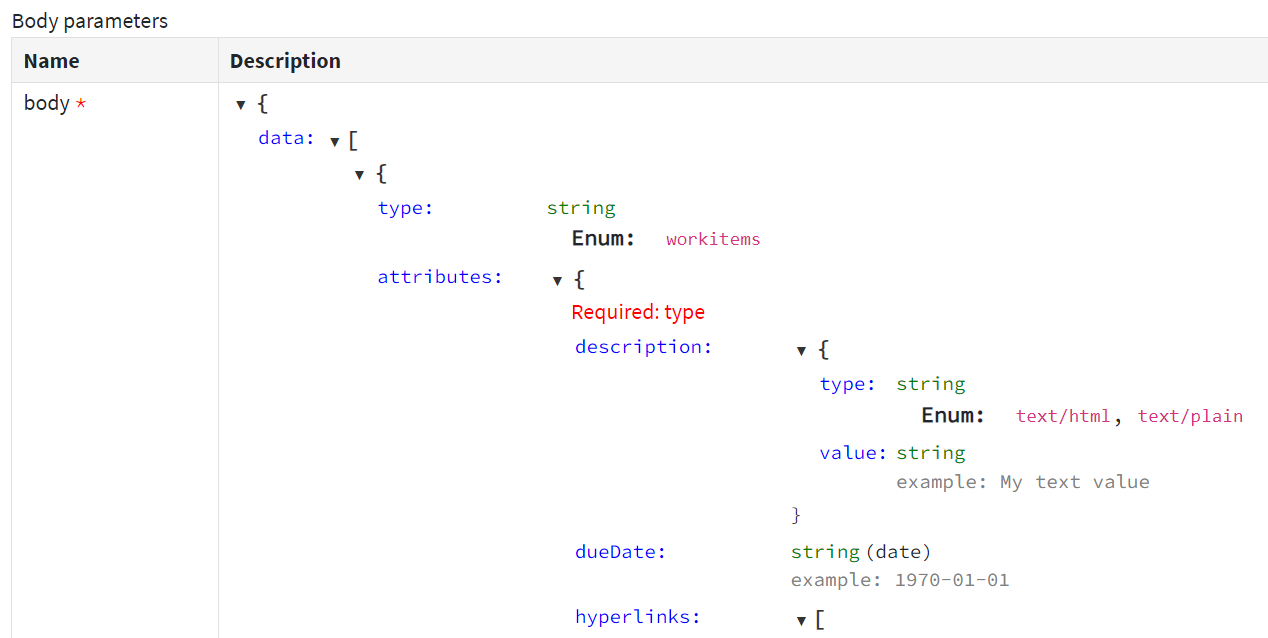
I’ll also include a „Test Title“ and „Test Description“ in the body:
#set($workItemTitle = $object.getTitle())
#set($projectId = $object.getProjectId())

<script>
 var contextWorkItemId = "$workItemId";
 var projectId = "$projectId";
 async function createWorkItem(){
  const url = 'http://localhost/polarion/rest/v1/projects/' + projectId + '/workitems';
  const requestBody = {
      data: [
      {
        type: 'workitems',
        attributes: {
          type: 'task',
          description: {
            type: 'text/html',
            value: 'Test Description'
          },
          title: 'Test Title'
        }
      }
    ]
  };
 }
</script>

<td class="niceTd" onclick="createWorkItem()"><button>Create Task</button></td>
And now we add the body to the options parameter. For the authorization we use the X-Polarion-Rest-Token that we can get from the window. Please don’t forget to activate it in the properties.
const options = {
 method: "POST",
 headers: {
  'X-Polarion-REST-Token': polarionRestApiToken,
  'Content-Type': 'application/json',
  'Accept': 'application/json'
 },
  body: JSON.stringify(requestBody)
};
And now we can create a workitem using the REST API with fetch(url, options). Additionally we shall wrap it in a try/catch and depending on the response we offer different error messages:
try {
      const response = await fetch(url, options);
      if (response.ok) {
        const responseBody = await response.json();
        console.log("Task created successfully:", responseBody);
        clickedButton.innerHTML = "Task created successfully";
      } else {
        console.log("Failed to create task:", response.status);
      }
    } catch (error) {
      console.error("Error creating task:", error);
    }
  }
Now we already have a working REST call, that creates an example task. This is how the function could look like as whole:
<script>
  var polarionRestApiToken = window.getRestApiToken();
  var contextWorkItemId = "$workItemId";
  var projectId = "$projectId";
  // This function creates a new work item
  async function createWorkItem(){
    let createWorkItemTitle = clickedButton.getAttribute("data-title");
    let createWorkItemDescription = clickedButton.getAttribute("data-description");
    const url = 'http://localhost/polarion/rest/v1/projects/' + projectId + '/workitems';
    const requestBody = {
        data: [
        {
          type: 'workitems',
          attributes: {
            type: 'task',
            description: {
              type: 'text/html',
              value: 'Test Description'
            },
            title: 'Test Title'
          }
        }
      ]
    };

    const options = {
      method: "POST",
      headers: {
        'X-Polarion-REST-Token': polarionRestApiToken,
        'Content-Type': 'application/json',
        'Accept': 'application/json'
      },
      body: JSON.stringify(requestBody)
    };

    try {
      const response = await fetch(url, options);
      if (response.ok) {
        const responseBody = await response.json();
        console.log("Task created successfully:", responseBody);
      } else {
        console.log("Failed to create task:", response.status);
      }
    } catch (error) {
      console.error("Error creating task:", error);
    }
  }
</script>
For debugging the Javascript, you should use the developer tools of your browser. You can open them with „F12“ and there go to the tab „Console“.
Creating the „linkWorkItem()“ function
Now we want to link the task after the creation to the requirement.
The linking of work items with the REST API is a bit special, because we have to work with the unique id of work items, which consists of the projectid + work item id.
Here is how this function could look like:
async function linkWorkItemAfterwards(sourceWorkItemId, targetWorkItemId){
		const urlLinkWorkItems = 'http://localhost/polarion/rest/v1/projects/' + projectId + '/workitems/' + sourceWorkItemId + '/linkedworkitems';
		const requestBody = {
			data: [
			{
				type: 'linkedworkitems',
				attributes: {
				role: 'relates_to'
				},
				relationships: {
				workItem: {
					data: {
					type: "workitems",
					id: projectId + '/' + targetWorkItemId
					}
				}
				}
			}
			]
		};

		try {
			const response = await fetch(urlLinkWorkItems, {
			method: "POST",
			headers: {
				'X-Polarion-REST-Token': polarionRestApiToken,
				'Content-Type': 'application/json',
				'Accept': 'application/json'
			},
			body: JSON.stringify(requestBody)
			});

			if (response.ok) {
			const responseBody = await response.json();
			console.log("Link created successfully:", responseBody);
			} else {
			console.log("Failed to create link:", response.status);
			}
		} catch (error) {
			console.error("Error creating link:", error);
		}
	}
Combining and making it look nice
And now we want to combine everything and additionally:
- Allow the user to enter title and description
- Add a loading animation
- Creating an additional function that will execute creation and linking after another
- General clean up
If you want to use this code, you might only adapt the line 2, 50 and 92:
## Context Variables and Configuration
#set($taskWorkItemType = "task")
#set($workItemId = $object.getId())
#set($projectId = $object.getProjectId())
#set($workItemTitle = $object.getTitle())

<style>
    /* Style for the table */
    .niceTable {
      width: 100%;
      border-collapse: collapse;
      border: 1px solid #ddd;
    }

    /* Style for table headers */
    .niceTh {
      background-color: #f2f2f2;
      color: #333;
      font-weight: bold;
      padding: 8px;
      border: 1px solid #ddd;
    }

    /* Style for table cells */
    .niceTd {
      padding: 8px;
      border: 1px solid #ddd;
      text-align: center;
    }

    /* Alternate row colors for better readability */
    niceTr:nth-child(even) {
      background-color: #f2f2f2;
      text-align: center;
    }

    /* Hover effect on rows */
    niceTr:hover {
      background-color: #ddd;
    }
</style>

<script>
  var polarionRestApiToken = window.getRestApiToken();
  var contextWorkItemId = "$workItemId";
  var projectId = "$projectId";
  // This function creates a new work item
  async function createWorkItem(workItemTitle, workItemDescription){

    const url = 'http://localhost/polarion/rest/v1/projects/' + projectId + '/workitems';
    const requestBody = {
        data: [
        {
          type: 'workitems',
          attributes: {
            type: 'task',
            description: {
              type: 'text/html',
              value: workItemDescription
            },
            title: workItemTitle
          }
        }
      ]
    };

    const options = {
      method: "POST",
      headers: {
        'X-Polarion-REST-Token': polarionRestApiToken,
        'Content-Type': 'application/json',
        'Accept': 'application/json'
      },
      body: JSON.stringify(requestBody)
    };

    try {
      const response = await fetch(url, options);
      if (response.ok) {
        const responseBody = await response.json();
        console.log("Task created successfully:", responseBody);
        return responseBody;
      } else {
        console.log("Failed to create task:", response.status);
      }
    } catch (error) {
      console.error("Error creating task:", error);
    }
  }

  async function linkWorkItem(sourceWorkItemId, targetWorkItemId){
		const urlLinkWorkItems = 'http://localhost/polarion/rest/v1/projects/' + projectId + '/workitems/' + sourceWorkItemId + '/linkedworkitems';
		const requestBody = {
			data: [
			{
				type: 'linkedworkitems',
				attributes: {
				role: 'relates_to'
				},
				relationships: {
				workItem: {
					data: {
					type: "workitems",
					id: projectId + '/' + targetWorkItemId
					}
				}
				}
			}
			]
		};

		try {
			const response = await fetch(urlLinkWorkItems, {
			method: "POST",
			headers: {
				'X-Polarion-REST-Token': polarionRestApiToken,
				'Content-Type': 'application/json',
				'Accept': 'application/json'
			},
			body: JSON.stringify(requestBody)
			});

			if (response.ok) {
			const responseBody = await response.json();
			console.log("Link created successfully:", responseBody);
			} else {
			console.log("Failed to create link:", response.status);
			}
		} catch (error) {
			console.error("Error creating link:", error);
		}
	}

  async function createAndLinkTask(){
    let clickedButton = event.target;
    clickedButton.disabled = true;
    clickedButton.innerHTML = '<i class="fa fa-spinner fa-spin"></i> Loading...';
    let createWorkItemTitle = document.getElementById('inputFieldTitle').value;
    let createWorkItemDescription = document.getElementById('inputFieldDescription').value;
    let createdWorkItemResponse = await createWorkItem(createWorkItemTitle, createWorkItemDescription);
    await linkWorkItem(createdWorkItemResponse.data[0].id.split("/")[1], contextWorkItemId);
    clickedButton.innerHTML = "Task created successfully";
  }
</script>

## Main
#set($renderingWorkItem = $transaction.workItems().getBy().oldApiObject($object))

## Define the SQL Query to get all linked tasks
#set($linkedWorkItemsQuery = "SQL:(select WORKITEM.C_URI from WORKITEM inner join PROJECT on PROJECT.C_URI = WORKITEM.FK_URI_PROJECT inner join STRUCT_WORKITEM_LINKEDWORKITEMS as SWL on WORKITEM.C_URI = SWL.FK_URI_P_WORKITEM inner join WORKITEM as WORKITEM2 on WORKITEM2.C_URI = SWL.FK_WORKITEM where PROJECT.C_ID = '$projectId' AND WORKITEM.C_TYPE = 'task' AND WORKITEM2.C_ID = '$workItemId')")
#set($linkedTasks = $trackerService.queryWorkItems($linkedWorkItemsQuery, "created"))

<div class="table-wrapper">
<table id="subTaskTable" class="niceTable">
	<tr class="niceTr">
		<th class="niceTh">ID</th>
		<th class="niceTh">Title</th>
        <th class="niceTh">Description</th>
		<th class="niceTh">Status</th>
    <th class="niceTh">Action</th>
	</tr>
#foreach($linkedWorkItem in $linkedTasks)
    <tr class="niceTr">
		<td class="niceTd">$!linkedWorkItem.getId()</td>
		<td class="niceTd">$!linkedWorkItem.getTitle()</td>
        <td class="niceTd">$transaction.workItems().getBy().oldApiObject($linkedWorkItem).fields().description().render().htmlFor().forFrame()</td>
		<td class="niceTd">$!linkedWorkItem.getStatus().getName()</td>
        <td class="niceTd">Already Existing</td>
	</tr>
#end
    <tr class="niceTr">
		<td class="niceTd">-</td>
		<td class="niceTd"><input type="text" id="inputFieldTitle" placeholder="Enter a Title..." /></td>
        <td class="niceTd"><input type="text" id="inputFieldDescription" placeholder="Enter a Description..." /></td>
		<td class="niceTd">-</td>
        <td class="niceTd" onclick="createAndLinkTask()"><button>Create Task</button></td>
	</tr>
</table>
</div>
And voilà, something that might have needed a few days, is now done in a few hours:
Hi, very useful demonstration of the form extensions feature. One thing I noticed is that your script works fine if used for form extension of the WorkItem page shown in your post. When you use the same extensions for extending the Work Item Properties this script no longer works. It seems as is not loaded into the site as the button has shows no triggered behaviour. Is this expected behaviour? And when yes why is that so? I can’t find any documentation regarding the differences for those 2 form extension possibilities.
Thanks in advance.
Hi Hendrik,
I don‘t know if it is intended, but you can‘t simply write js in a block in the properties form extension. There is a workaround though. Add the js part to the button onclick=„[jscode]“
Best,
Dude
Hello,
I tried to extend the document properties sidebar in a similar way, but the script section was also not recognized. I added this line in the Administration section of Polarion:
And my .vm file looks like this (under /opt/polarion/scripts):
function setButtonState() {
console.log(„clicked“);
}
function sendEmails() {
console.log(„send Emails“);
}
send Emails to users?
Send
But the functions can’t be called via the onclick events. Any idea how to fix this?
Currently you can’t simply put javascript in tags for the document properties sidebar.
The only workaround I know is, to add the whole code directly into the onclick event:
Button
Please write the support, that you would like to have this. I have already an open ER (hopefully it will be recognized as a defect in future) for this. It will increase the priority, the more requestors we have.
Hi – thanks for the excellent example, I got a REST form extension working nearly first time with this help.
Only problem was running the code a second and subsequent time on different workitems, it was linking up to the first workitem I linked to regardless.
Eventually I found out that many variables in your code example are set as CONSTS, and thus were not resetting when a new execution was taking place. Changing all CONSTs to VARs seemed to solve this problem.
Keep up the excellent blog work!
Hello Ian,
thank you for the hint – you‘re absolutely right. I will change it.
Best regards,
Dude
I am trying to update a work item in Polarion using the PATCH method via REST API. Below is the method I am using:
const options = {
method: ‚PATCH‘,
headers: {
‚Authorization‘: ‚Bearer {personal_access_token}‘,
‚Content-Type‘: ‚application/json‘,
‚Accept‘: ‚application/json‘
}
}
Error Encountered:
I am receiving the following error:
Failed to update work item: 400 („errors“status“:“400″,“title“:“Bad Request“, „detail“: „Unexpected resource reference, expected ‚drivepilot/DP-4815, but was: DP-4815″,“source“: [„pointer“:“$.data“,“parameter“:null}
Current Understanding and Questions:
workflowAction, I am unclear about the purpose of this parameter and its expected value.Objective:
{workflowAction}and{changeTypeTo}.Additional Information:
The API is being used for a single type of work item.
Here is an example of the full URL being used:
https://example.com/polarion/rest/v1/projects/drivepilot/workitems/DP-4815?workflowAction={workflowAction}&changeTypeTo={changeTypeTo}
Can you please provide guidance on what values should be used for
{workflowAction}and{changeTypeTo}and help me understand why I am encountering this error?I am trying to update a work item in Polarion using the PATCH method via REST API. Below is the method I am using:
Hi Nikith,
without the body it’s usually difficult to troubleshoot, but in this instance the problem is stated in the error message:
„expected ‚drivepilot/DP-4815, but was: DP-4815“
You have to create the correct id key value pair in the body. Id in rest api requests is project + id.
I would recommend to ask such support questions in the polarion community where more people can help you: https://community.sw.siemens.com/s/topic/0TO4O000000MihxWAC/polarion.
Schöne Grüße
Florian
Hi!
This is a very helpful post. Thanks for spending the time and sharing the knowledge!
I wonder what it would take to make the response visible immediately after the change. What I mean: after the Create Task button is clicked, to refresh the table and visualize the newly added task in the rows. By this, it would not be necessary to refresh the work item by clicking on the refresh button in the top right corner.
Best,
Admir
Hi Admir,
simply take the return value after creating the work item and render the id/link/icon.
Best regards,
Dude
Hi,
Thanks for your reply. How could I do that? I understand the html code is loaded once the WI is opened. It goes through a foreach loop and displays what is there (shows the connected tasks).
How can I make the script run again the loop? Or how can I append to this once I get the return value? Do I need to modify the table from the JS?
A small code snippet how this can be done would be quite helpful 🙂
(sorry :(, wanted to reply, but created a new comment instead – feel free to delete the other comment)
Yes you have to use JS to alternate the table
Hi,
Thanks for your reply. How could I do that? I understand the html code is loaded once the WI is opened. It goes through a foreach loop and displays what is there (shows the connected tasks).
How can I make the script run again the loop? Or how can I append to this once I get the return value? Do I need to modify the table from the JS?
A small code snippet how this can be done would be quite helpful 🙂