

The extension portal offers a super powerfull widget that basically allows you to create your own widget UI via drag & drop and the execution logic via Javascript. In most cases this will be much quicker than creating your own Java widgets, because you don’t have to build the front-end from scratch and you don’t have to debug it via eclipse by restarting the Polarion service every time. This is why the active questionnaire is a must-know for everyone who wants to create data creating/alternating widgets.
I will show how you can create an input form that allows you to create a requirement and multiple linked test cases easily via your own UI. This post should be the foundation for future posts, where I explain more complex topics.
Obligatory warning: Because this widget will be able to alternate data in Polarion, you should thoroughly test your developments before deploying it on any productive system. Get your local 30-day trial: https://polarion.code.blog/2020/06/12/basics-part-5-get-your-own-free-local-polarion-installation/. The advantage of this extension also comes with an obvious drawback: users with edit live repo page rights can create powerful scripts, that usually have to be deployed on server.
Additional warning: It seems as if the trackerService is not available, if the PSO-SE engine is installed. Investigations to why this is the case are ongoing.
Active Questionnaire
First: What is the active questionnaire I’m talking about?
It is this widget: https://extensions.polarion.com/extensions/320-active-questionnaire
Don’t forget to delete the [PolarionInstall]/data/workspace/.config folder during installation and restart.
It is a widget that you can add to any report page and it can be configured via the widget parameters.
There are two main parameters you can configure:
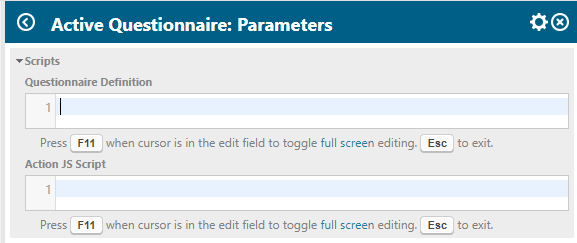
- Questionnaire Definition: JSON Format definition of the front-end. Can be created via drag-drop here: https://surveyjs.io/create-survey
- Action JS Script: Where the magic happens. It is pretty similar to workflow scripts. You can retrieve the data entered into the UI as JSON and then add some logic that will be executed server side via Javascript. AND it has the capability to execute „writing“ methods of the API and change saves, which would normally need servlets or java widgets.
Create UI
This is the best part of the AQ. It uses an open source library to create it’s UI via a JSON definition. And this definition can be created via drag & drop here: https://surveyjs.io/create-survey
In „todays“ example I want to create:
- One field for the title and another field for the description of the requirement that should be created.
- A field where I can enter multiple test case titles. So that I can create multiple test cases at once for the requirement.
- After clicking „complete“ the requirements and test cases should be created and linked.
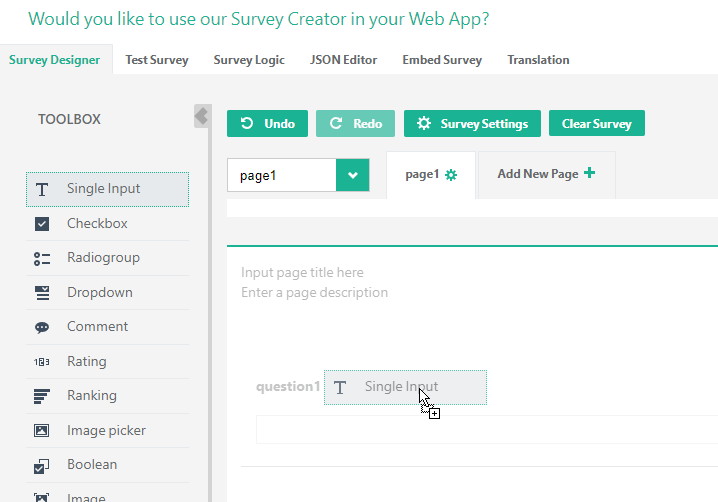
Let’s start with the UI creation:
- Go to https://surveyjs.io/create-survey
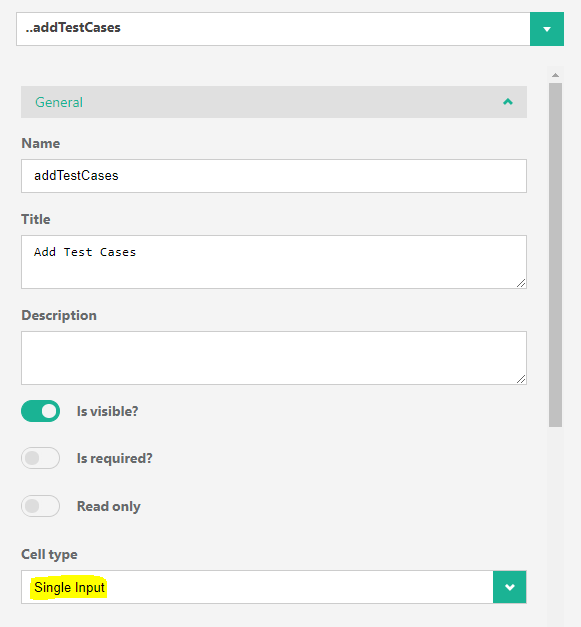
- Drag a „Single Input“ from the left toolbox to the page.
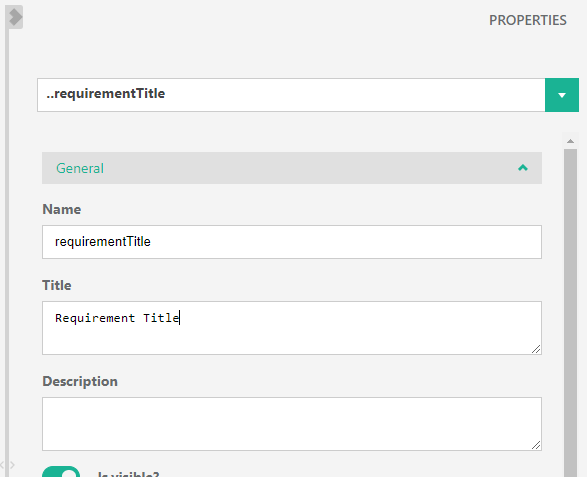
- Adapt the properties on the right side – I recommend basic naming conventions:
– Change the name (ID) e.g. „requirementTitle“
– Change the Title (Name) e.g. „Requirement Title“
- Now we do the same with a „comment“ field to add a description for the requirement.
- And lastly we need a dynamic field to create multiple test cases at once. Therefore we use the „Matrix (dynamic rows)“.
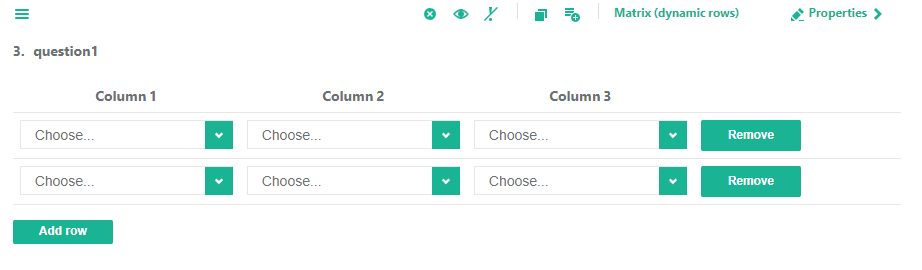
We just want to have one row to start with and each row should have one field to enter a title.
This can be configured in the settings. First we change the „Cell type“ to „Single Input“:
Then we change the „Row count“ to 1 and adapt the columns: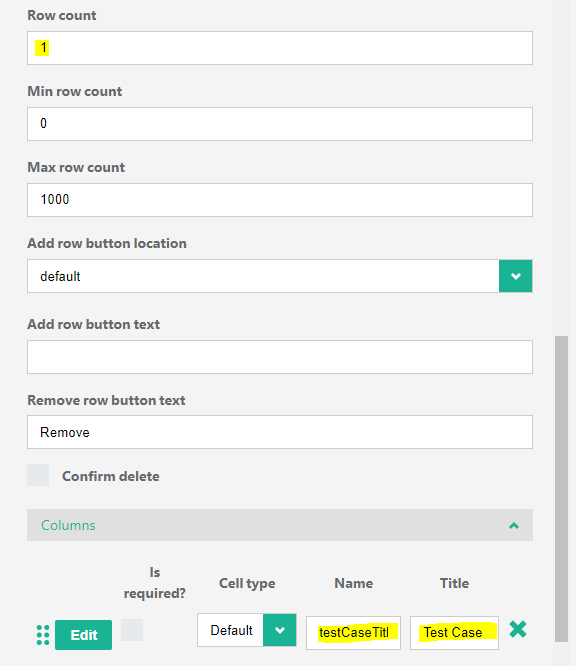
Now our UI looks as desired and we can test it, if we go to the „Test Survey“-tab: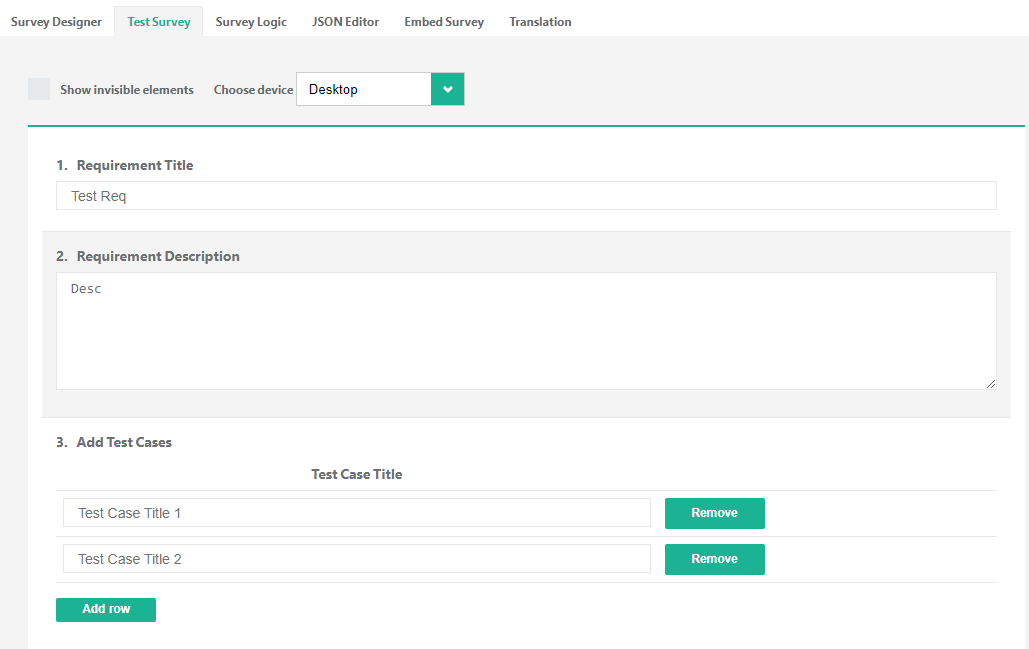
- If we’re satisfied with the result, we simply go to the „JSON Editor“-tab, copy the code and paste it into the „Questionnaire Definition“-widget parameter of the active questionnaire in Polarion:

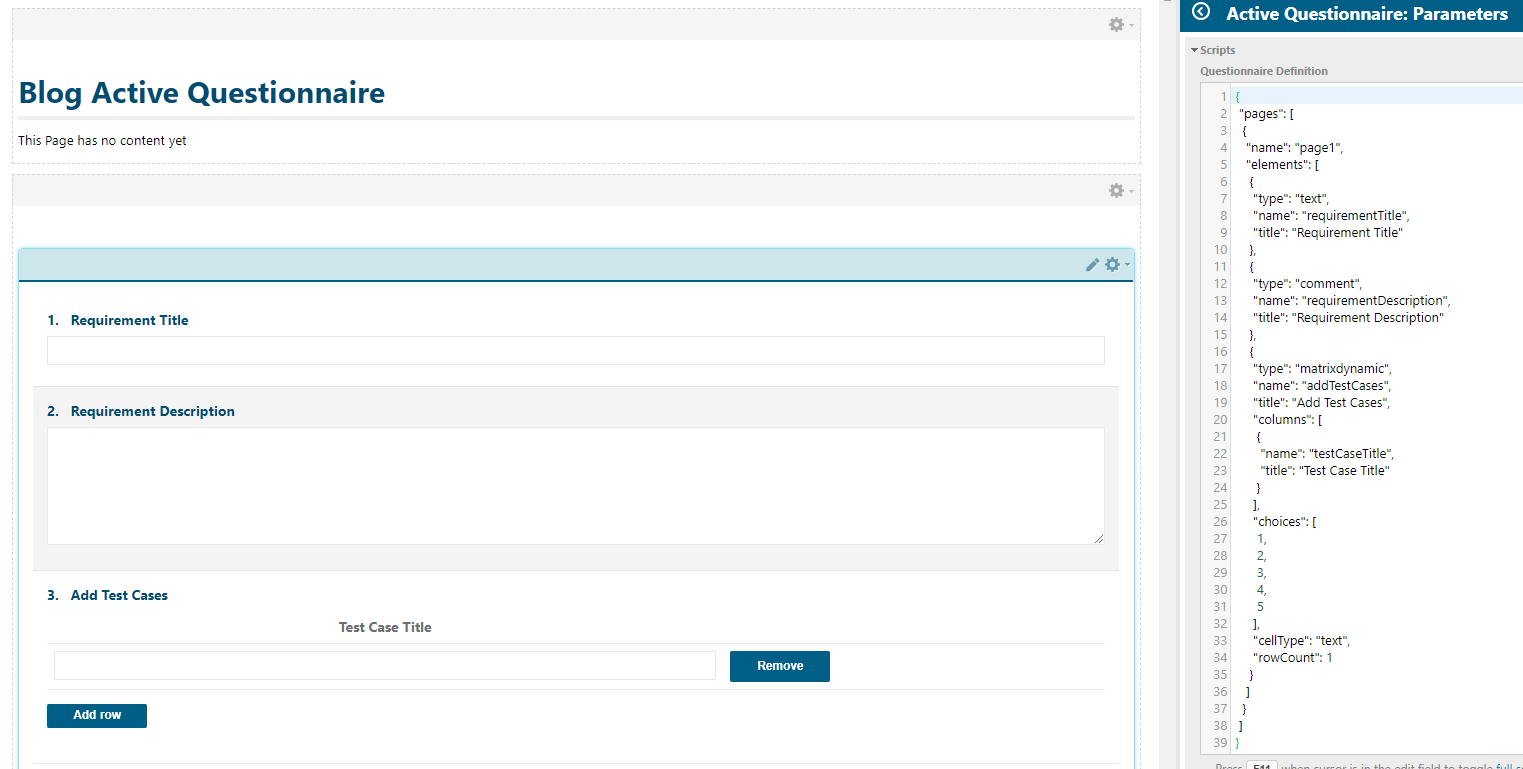
It might look differently for you, as the current version 1.0.5 of the AQ is a bit outdated and I recently updated the AQ to support the latest surveyJS library. But the updated version will be available very soon on the extension portal.
Create Action JS
Coming to the interesting part: How to retrieve the entered data and how to create all of the work items and link them.
For the following I recommend to use an editor like Visual Studio Code or Notepad++ that has atleast syntax highlighting, as this will show you some missing punctuation marks or wrong syntax and provides me a better overview than the small widget parameter window (I know F11… but still). To test the code you can then CTRL+A, CTRL+C, CTRL+V to copy the code to your widget parameters. I also recommend to check in the action.js regularly into a repository, to be able to roll back (you can then take a look at the diff log and find correct versions very easily).
I will go trough the code step by step to explain everything. The complete code will be available at the bottom, so that you don’t have to copy each block seperately.
And now we’ll really start.
At the top of our code we want to set all of the configuration variables, to make the code maintainable and adaptable to changes. We also want to retrieve all the services and helper variables like project id:
// Helper Variables
var projectId = page.getReference().projectId();
var project = trackerService.getProjectsService().getProject(projectId);
var trackerProject = trackerService.getTrackerProject(project);
var trackerPrefix = trackerProject.getTrackerPrefix();
var dataService = trackerService.getDataService();

// Configuration
var linkRoleRelatesTo = trackerProject.getWorkItemLinkRoleEnum().wrapOption("relates_to");
var typeEnum = dataService.getEnumerationForKey("WorkItem", "type", project.getContextId());
var enumOptRequirement = typeEnum.wrapOption("requirement");
var enumOptTestCase = typeEnum.wrapOption("testcase");
Depending on your project configuration you might have to adapt the work item type ids and link role id in line 9,11 & 12.
We have to create these options, if we later want to set the type of work item types and link roles.
Now there is some optional part here. During creation I will save the data like ID and how they are linked into js objects, so that I could enhance it later easily and wouldn’t have to retrieve the data again from Polarion. (In this example it is not necessary – but maybe I’ll create some follow-ups with more complex solutions.)
So I will create a constructor for requirements and test cases:
// Constructor for Requirements
function requirementsObject (requirementId, requirementTitle) {
    this.id = requirementId;
    this.title = requirementTitle;
    this.testCases = [];
}

// Constructor for TestCases
function testCaseObject (testCaseId, testCaseTitle) {
    this.id = testCaseId;
    this.title = testCaseTitle;
}
Now I will create the requirement object with the title and description in Polarion and save it in parallely into a js object:
// Create Requirement in Polarion
var requirement = trackerService.createWorkItem(project);
requirement.setType(enumOptRequirement);
requirement.setTitle(surveyData.getAsJsonObject().get('requirementTitle').getAsString().trim());
requirement.setDescription(com.polarion.core.util.types.Text.html(surveyData.getAsJsonObject().get('requirementDescription').getAsString().trim()));
requirement.save();
We can see, that we are able to retrieve the entered values in the UI via „surveyData.getAsJsonObject().get(‚[FIELDID]‘).getAsString()“. But because we don’t want to repeat this over and over and might also do some nullpointer check, we’ll create a function that will do this for us:
// Function to retrieve string by providing the questionId
function getValueAsStringFromJsonByQuestionId(questionId) {
    if (surveyData.getAsJsonObject().get(questionId)) {
        return surveyData.getAsJsonObject().get(questionId).getAsString().trim();
    }
}

// Which changes the code to:

// Create Requirement in Polarion
var requirement = trackerService.createWorkItem(project);
requirement.setType(enumOptRequirement);
requirement.setTitle(getValueAsStringFromJsonByQuestionId('requirementTitle'));
requirement.setDescription(com.polarion.core.util.types.Text.html(getValueAsStringFromJsonByQuestionId('requirementDescription')));
requirement.save();
The cast „com.polarion.core.util.types.Text.html()“ is needed to set the value of a Rich Text field.
Now we have to do the same for each test case title entered and link it to the requirement. For the linking I wrote a small function:
// Function to link work items
function linkWorkItems(startWorkItem, endWorkItem, linkRoleOption)
{
    startWorkItem.addLinkedItem(endWorkItem, linkRoleOption, null, false);
    startWorkItem.save();
    endWorkItem.save();
}
Which we’ll use after creating the test cases:
var testCasesData = surveyData.getAsJsonObject().get('addTestCases');
for(var i = 0; i < testCasesData.size(); i++){
    var testCaseTitle = testCasesData.get(i).get('testCaseTitle').getAsString().trim();
    var testCase = trackerService.createWorkItem(project);
    testCase.setType(enumOptTestCase);
    testCase.setTitle(testCaseTitle);
    testCase.save();
    linkWorkItems(testCase, requirement, linkRoleRelatesTo);
    // Saving data into js objects
    var testCaseData =  new testCaseObject(testCase.getId(),
        testCaseTitle);
    requirementData['testCases'].push(testCaseData);
}
Full questionnaire definition:
{
 "pages": [
  {
   "name": "page1",
   "elements": [
    {
     "type": "text",
     "name": "requirementTitle",
     "title": "Requirement Title"
    },
    {
     "type": "comment",
     "name": "requirementDescription",
     "title": "Requirement Description"
    },
    {
     "type": "matrixdynamic",
     "name": "addTestCases",
     "title": "Add Test Cases",
     "columns": [
      {
       "name": "testCaseTitle",
       "title": "Test Case Title"
      }
     ],
     "choices": [
      1,
      2,
      3,
      4,
      5
     ],
     "cellType": "text",
     "rowCount": 1
    }
   ]
  }
 ]
}
Full Action.js example:
/*****************************************************************************************************
 * Author:
 * Date:
 * Version:
 * Description:
 *****************************************************************************************************/

/*****************************************************************************************************
 * Configuration and Helper Variables
 *****************************************************************************************************/
// Helper Variables
var projectId = page.getReference().projectId();
var project = trackerService.getProjectsService().getProject(projectId);
var trackerProject = trackerService.getTrackerProject(project);
var trackerPrefix = trackerProject.getTrackerPrefix();
var dataService = trackerService.getDataService();

// Configuration
var linkRoleRelatesTo = trackerProject.getWorkItemLinkRoleEnum().wrapOption("relates_to");
var typeEnum = dataService.getEnumerationForKey("WorkItem", "type", project.getContextId());
var enumOptRequirement = typeEnum.wrapOption("requirement");
var enumOptTestCase = typeEnum.wrapOption("testcase");
var testRunTemplateId = "TEMPLATE"; // Template used for Test Run creation
var testRunPrefix = 'TEST';

/*****************************************************************************************************
 * Constructors & Functions
 *****************************************************************************************************/
// Constructor for Requirements
function requirementsObject (requirementId, requirementTitle, requirementDescription) {
    this.id = requirementId;
    this.title = requirementTitle;
    this.description = requirementDescription;
    this.testCases = [];
}

// Constructor for TestCases
function testCaseObject (testCaseId, testCaseTitle) {
    this.id = testCaseId;
    this.title = testCaseTitle;
}

// Function to retrieve string by providing the questionId
function getValueAsStringFromJsonByQuestionId(questionId) {
    if (surveyData.getAsJsonObject().get(questionId)) {
        return surveyData.getAsJsonObject().get(questionId).getAsString().trim();
    }
}

// Function to link work items
function linkWorkItems(startWorkItem, endWorkItem, linkRoleOption)
{
    startWorkItem.addLinkedItem(endWorkItem, linkRoleOption, null, false);
    startWorkItem.save();
    endWorkItem.save();
}

/*****************************************************************************************************
 * Main
 *****************************************************************************************************/
// Create Requirement in Polarion
var requirement = trackerService.createWorkItem(project);
requirement.setType(enumOptRequirement);
requirement.setTitle(getValueAsStringFromJsonByQuestionId('requirementTitle'));
requirement.setDescription(com.polarion.core.util.types.Text.html(getValueAsStringFromJsonByQuestionId('requirementDescription')));
requirement.save();
var requirementId = requirement.getId();

// Create a JS object of the requirement created
var requirementData =  new requirementsObject(requirementId,
    getValueAsStringFromJsonByQuestionId('requirementTitle'),
    getValueAsStringFromJsonByQuestionId('requirementDescription'));

var testCasesData = surveyData.getAsJsonObject().get('addTestCases');
for(var i = 0; i < testCasesData.size(); i++){
    var testCaseTitle = testCasesData.get(i).get('testCaseTitle').getAsString().trim();
    var testCase = trackerService.createWorkItem(project);
    testCase.setType(enumOptTestCase);
    testCase.setTitle(testCaseTitle);
    testCase.save();
    linkWorkItems(testCase, requirement, linkRoleRelatesTo);
    var testCaseData =  new testCaseObject(testCase.getId(),
        testCaseTitle);
    requirementData['testCases'].push(testCaseData);
}
Summary
This widget really speeds up the development of the development of custom report pages that have to execute some server side javascript. But also keep in mind the potential drawbacks, if more users can create powerful scripts.
Hello,
Thank you for the details knowledge.
Can you please tell me how to debug the JS code using active questionnaire, I am not able to check the values for the set variables.
And also, I am trying to set the „Assignee“ field by questionnaire and I am not able to set the assignee field value from this widget.
Thanks!
Hi Nayanw,
everything you safe in the otherJS variable in the actionJS will be executed client side after the execution of the actionJS.
Just add something like: otherJS = ‚console.log(variable)‘ (and check then the console) or print the values in the page.
Best regards,
Florian
Thanks for the reply 🙂
Do you also know about setting the workitem „Assignee“ field from questionnaire?
Can we do this customization in Polarion® ALM™ 20 R2
Hello Sai,
in general it is possible. But unfortunately the extension portal only hosts the latest version. Which might not be compatible with your version.
You should try it. And if not, it wouldn’t be difficult to „downgrade“ the extension, because the source code is delivered with it.
The only thing you would have to do is to check, that all used java packages are available in the older java version.
Kind regards,
Dude
Is there a way to give information back to the user. Say I am creating a new workitem how can I tell the user the workitem id of the new workitem?
Yes, just enter in the „otherJS“ variable what should be done after execution. E.g. to add the work item id into a div of the page. Or rather create a link to the workitem.