

In this post I will go trough the steps to set up a simple toolchain that allows me to manage my small development projects:
- Polarion to keep track of all User Stories/Requirements, Change Requests and Issues that are planned and fixed in a specific release.
- Jenkins to configure your build management for your software and to trigger SonarQube or other test automation.
- SonarQube to perform a static code analysis for each build to keep continously track of code quality.
As most of my developments center around Polarion customizings, I will use the development of a simple workflow script as example to go trough each step. The target is to be capable to track which code was committed for a specific User Story/Requirement/Change Request/Issue Fix. Then which of them is contained in a specific release. This setup will also allow to keep track of the quality of each release determined by the static code analysis of SonarQube and the test results of a release.
Additionally the build should have the option to be deployed automatically to speed up the test process.
To achive this we have to go trough the following steps:
- Install Polarion
- Create (and configure) a project
- Install Jenkins
- Configure Jenkins/Polarion integration
- Configure Build in Jenkins
- Configure Builds in Polarion
- Adding SonarQube analysis configuration
As I’m not very experienced in Jenkins and SonarQube configuration you might find better ways to do things I explain here. I’ll be glad about every hint – just leave a comment or contact me 😉
1. Install Polarion
You can find a guide of how to install a local Polarion here: Install Guide
If you want to use the Polarion Subversion for recent Polarion version (since 21R1 and 21R2) you will have to configure the direct repository acces first. You can find a guide for it in the Polarion help: Configure direct SVN access
2. Create (and configure) a project
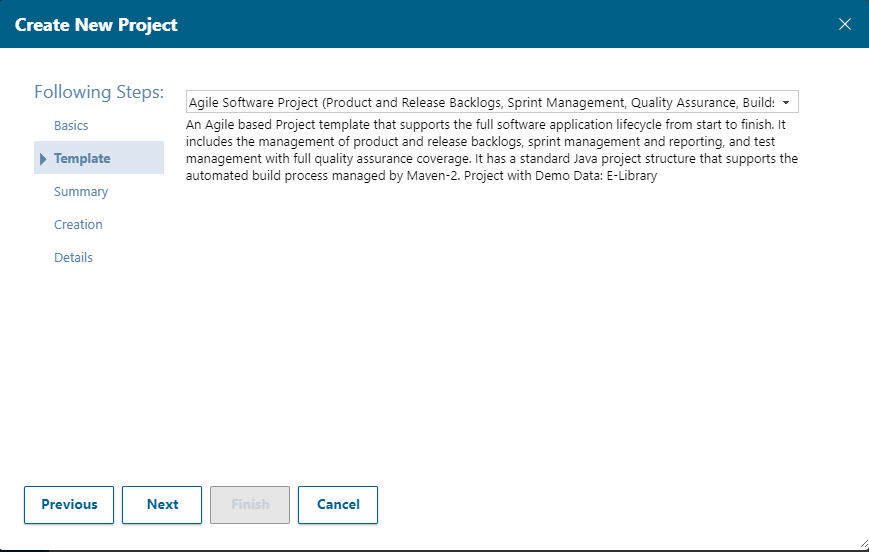
For my own small developments I’m using a lightweight project configuration to keep track of all Requirements/User Stories/Change Requests I want to implement and issues that were found. For this I’m starting with a clean new project based on the „Agile Software Project“ template.
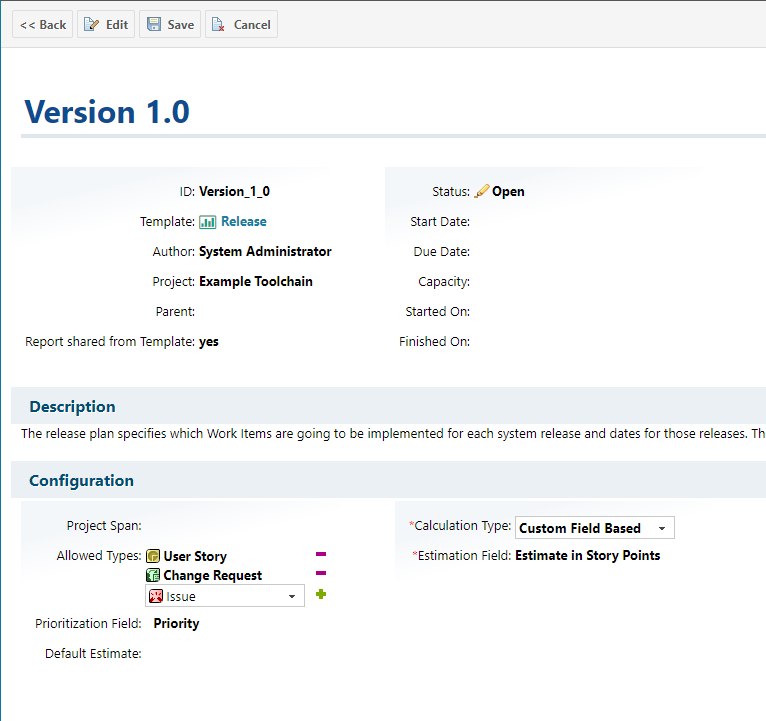
The only thing I like to change is to add Issues and Change Requests to the plans configuration, because I want to plan those like User Stories. For my small project I like to add story points to the Change Requests and Issues, too. Although in „real“ projects it might not make much sense to provide Issues with additional story points. Firstly because the effort should already be in the previous User Story and Issue fixes would normally not provide any additional value to a product. Therefore it might be misleading, if our Issue fixes provide story points, because it looks like we did a lot of work and made steps to our final goal. But in reality there was no progress to the development goal – just some story point cheating.
To keep it simple and document all the User Stories/Change Requests/Issues I’m simply using a single „backlog“ document with three chapters.
In order to know which tasks were resolved for which release and in which build, I will create release work item for each build that I want to ship, where I will combine all the information.
3. Install Jenkins
Installing Jenkins was pretty straight forward for me. We dont have to care about any prerequisites, because we had to install the jdk 11 already for Polarion.
You can find the latest Jenkins versions here: https://www.jenkins.io/download/
Download the installer for your system and execute it.
During the installation you’re asked, if you want to add firewall exceptions for Jenkins. I did that on my local machine – you might need another firewall setup in other environements.
4. Configure Jenkins/Polarion integration
Now we want to configure, that we can start Jenkins builds from the „Builds“ section in Polarion and that the results will be sent back to Polarion.
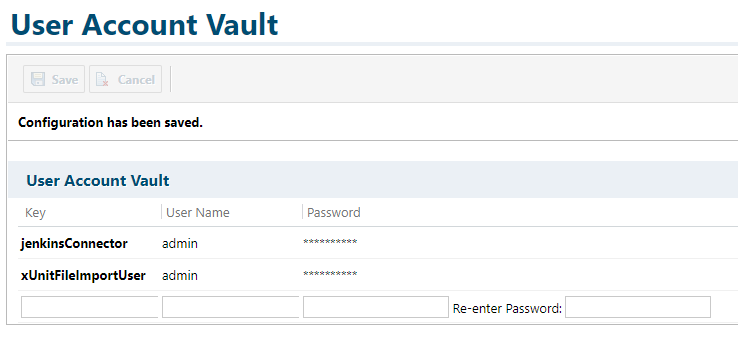
Let’s start with the necessary users on both sides: On Polarion side be need an „Account Vault User“ . To create such one we go to „Global Administration > User Management > User Account Vault“. Here I created the user „jenkinsConnector“. In a productive system you shouldn’t use the global admin account.
But it has to be a user who has permissions for the project that we want to connect with a jenkins project.
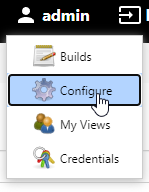
Now we also need a user on the jenkins side. I’ll be using the admin account for that. Simply go to your Jenkins, hover above your name and click „configure“:
Then click on „Add new Token“. Please save this token.
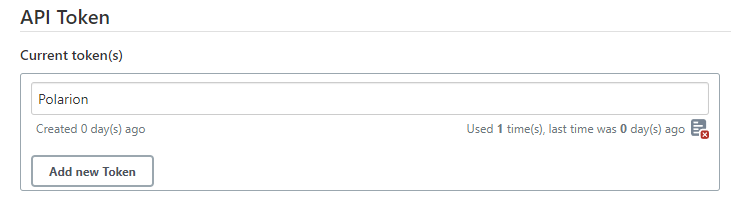
This token is needed for Polarion to authenticate to Jenkins instead of using a password.
With this token we go to „Polarion Project > Administration > Building > CD/CD Integration“ and click „Add Connection“:
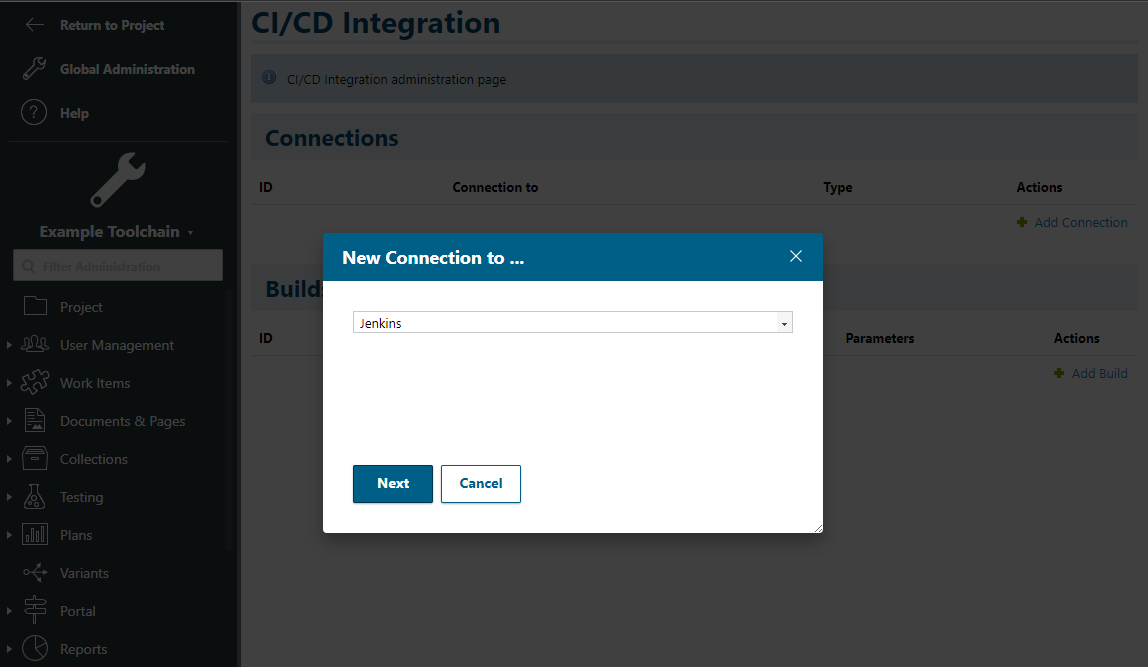
Select Jenkins (currently the only choice), then next.
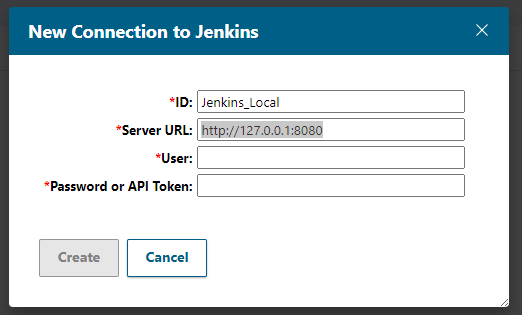
- ID: Any ID you want to give this Jenkins
- Server URL: URL (and port) of your Jenkins
- User: Jenkins user
- Password or API Token: The token we just copied from Jenkins
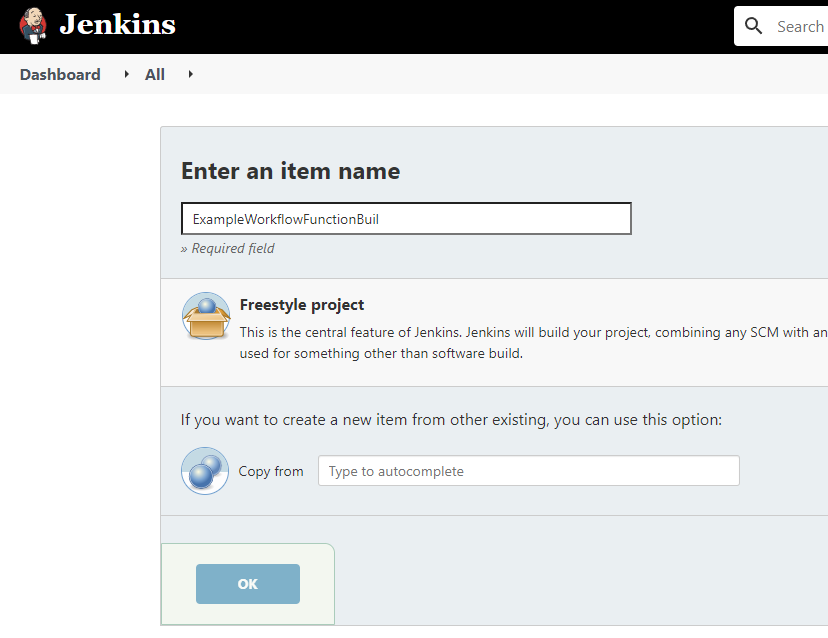
Now we need a project on Jenkins side that we can connect to create individual build configurations in Polarion.
So we go to Jenkins and create a new project (skip, if you want to connect an existing).
Then we have to configure the build.
5. Configure Build Management in Jenkins
This step will be different for everyone. But because it’s one tool less to set up – I’m using the Polarion SVN to store the workflow javscripts.
As I use the default repository of Polarion to store the sources of the widget, I installed the „Subversion“ Plugin for Jenkins. If you use a git repo, you should install the git plugin first.
Keep in mind: If you want to use the Polarion Subversion for recent Polarion version (since 21R1 and 21R2) you will have to configure the direct repository acces first. You can find a guide for it in the Polarion help: Configure direct SVN access to check in and out your code or manage diffs I use TortoiseSVN. Maybe you might take a look at: Revert changes and recover deleted files, where I explain what you can do with it.
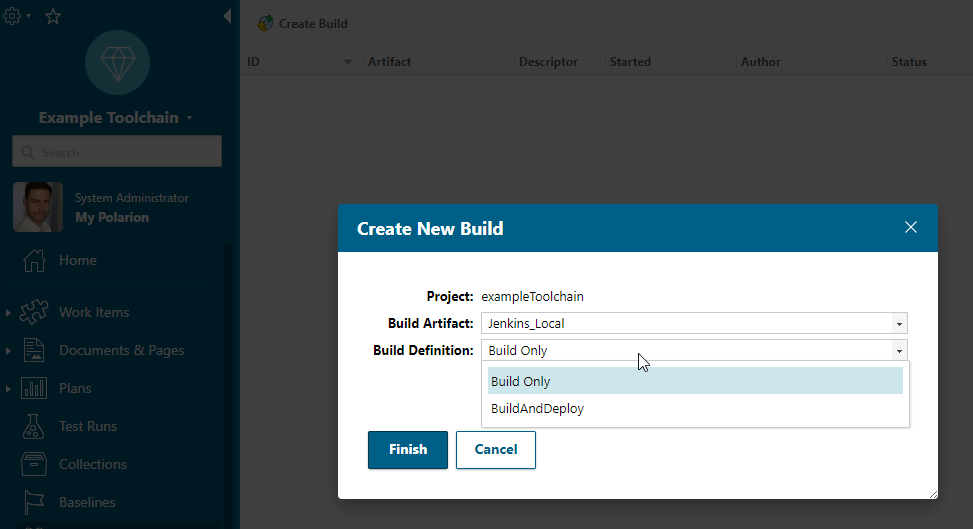
The first configuration is the parametrization of the build – because we want to be able to select, if the widget should just be packaged for download, or if we want to automatically deploy it for testing, too (to speed up testing process):
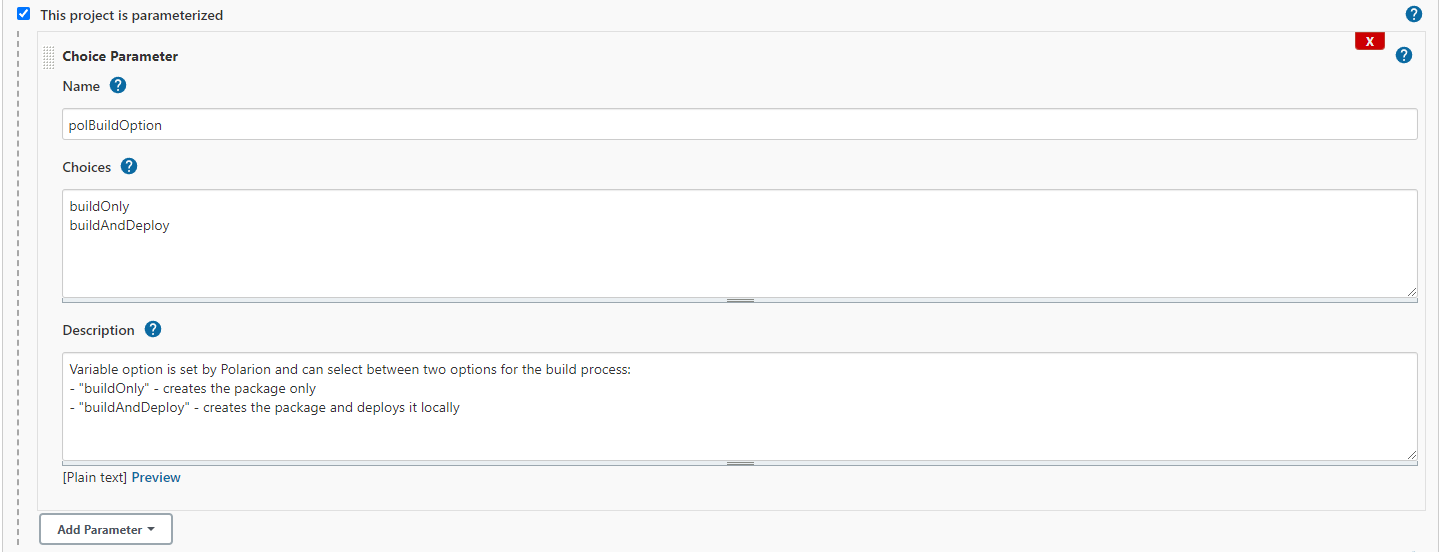
These options will be available for selection on Polarion side later:
[PICTURE]
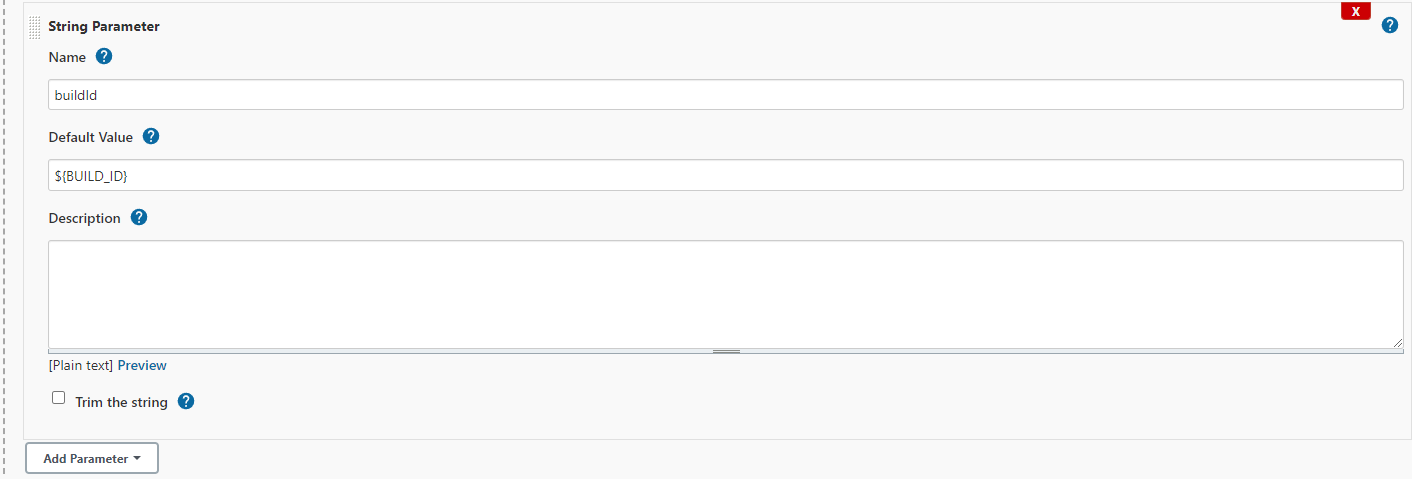
Additionally we want to apply a build number to our builds later, so we’ll set the build number as variable for later:
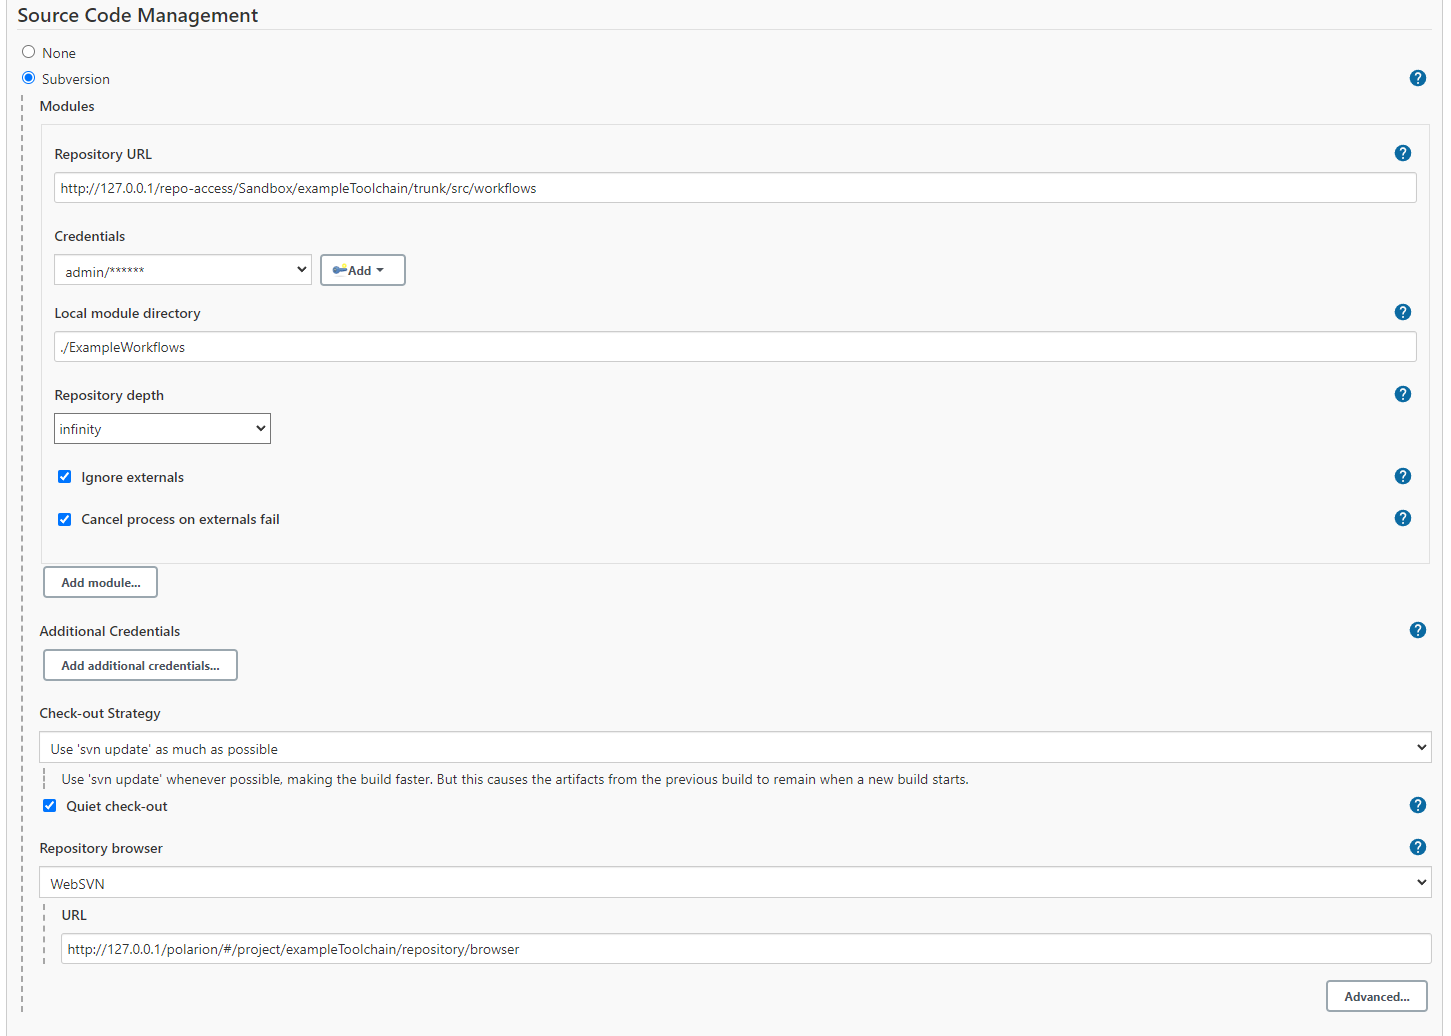
In the „Source Code Management“ area we have to define where the sources of our widget are stored:
- Repository URL: The path that Jenkins will checkout (your sources).
- Credentials: A Polarion user with access to the repository path. Simply add a new one in Jenkins.
- Local module directory: The folder where Jenkins will put the files. Relative to Jenkins workspace.
- Repository browser: I simply used WebSVN… and as URL the repository browser URL of the Polarion project. – Seems to work fine.
The next important part is the „Build“ section. In our case it’s pretty simple, because we just have to checkout the existing files. Additionally I want to add the correct build number to the zip file and also add the build number to a „version.txt“.
For this issue a small batch command is enough. (You will need to adapt line 7 to your 7-zip .exe or use another way to create a .zip)
echo Remove old zip artifacts from workspace
del *.zip
echo Add version.txt with build number.
echo Build Id: %buildId% > ./ExampleWorkflows/version.txt
echo Zip file and add build id to zip name.
"C:\Program Files\7-Zip\7z.exe" a -tzip "./ExampleWorkflows_%buildId%.zip" "./ExampleWorkflows" -xr!.svn -xr!.scannerwork
echo Done!
To make the build available for Polarion, we have to archive the .zip. The archived files will be transfered to Polarion.

6. Configure Builds in Polarion:
After configuring our build we now want to trigger it from Polarion side. Therefore we go to „(Project) Administration > Building > CI/CD Integration“ and add a new build:
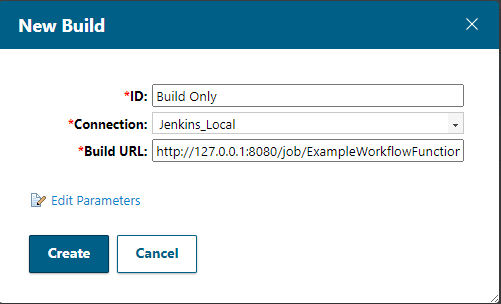
The build URL is the url you see in your browser, if you select the build project in Jenkins:
But before we click „Create“, we have to add parameters by clicking „Edit Parameters“:
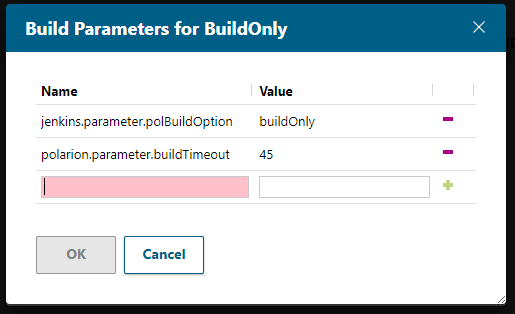
Don’t forget to click the green plus after adding the second parameter.
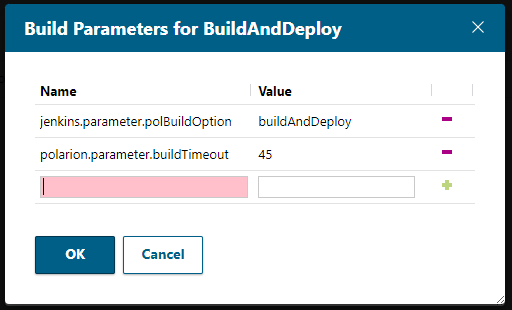
Then click „Ok“ and „Create“. Do the same for another build called „BuildAndDeploy“ but with „jenkins.parameter.polBuildOption“ set to „buildAndDeploy“.
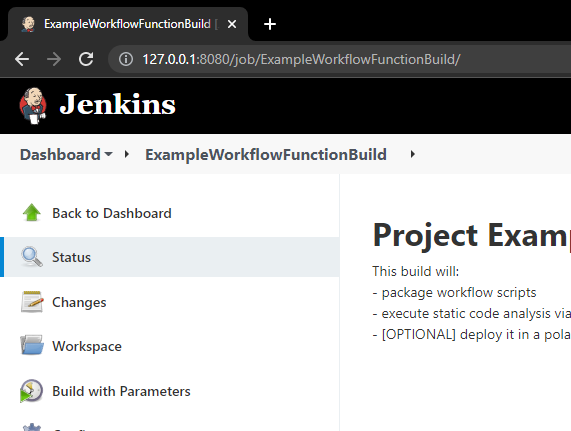
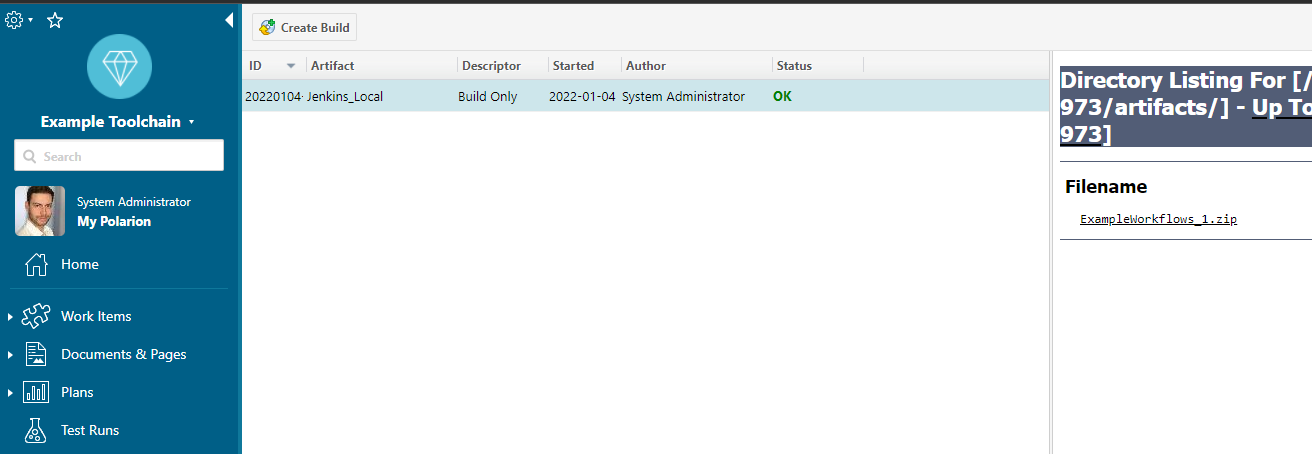
If we go now to the Build section in the project, we can start our builds directly from Polarion (Both options do the same at the current point in time):
After finishing a build, the artificats should be available in Polarion, if you open the artifacts link in the build:
7. Adding SonarQube analysis configuration.
Now we want to add an automatic static code analysis of SonarQube to each build.
Prerequisites
To use SonarQube we need to set up a SonarQube server. But to set up a SonarQube Server we need a PostgreSQL and Java JDK, see: SonarQube prerequesites for supported versions. Luckily we can use the same JDK 11 needed for Polarion.
So we just need the PostgreSQL database.
To install a new postgresql database I downloaded the installer for my Windows and clicked trough the wizard. I just didn’t install pgAdmin 4, because it was already installed and changed the port to an unused one (Check your Polarion postgresql port – it’s often the 5432). Everything else was default. (The default user for the database is „postgres“ – you have to set a password for the database).
Install SonarQube Server
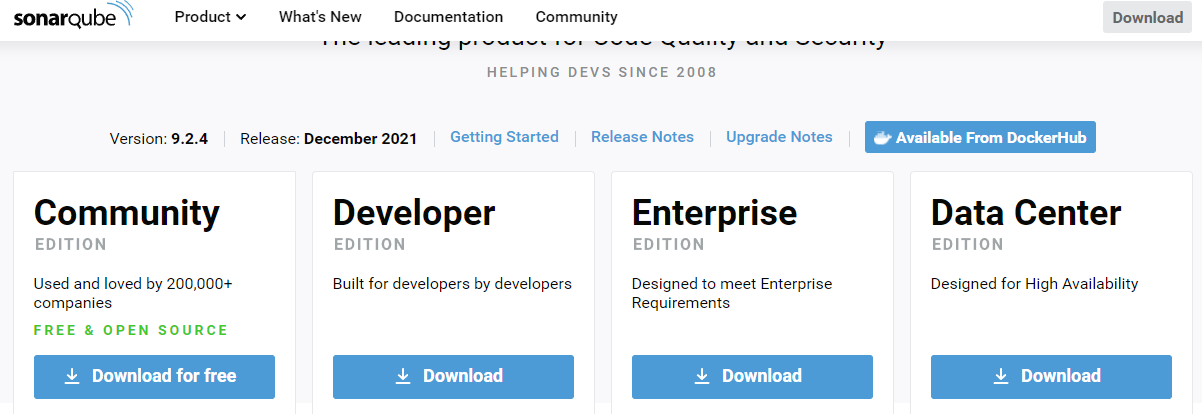
Go to SonarQube.Org and download the „Community Edition“ for free. This was enough for my purposes.
We have to install it manually. So I copied the folder in the zip to my C:\Program Files\.
Then we have to adapt some configurations in the [SONARQUBE_PATH]\conf\wrapper.conf and [SONARQUBE_PATH]\conf\sonar.properties
Changes in wrapper.conf: Add the path to your java jdk.

Changes in sonar.properties:
- Add sonar.jdbc.username / password: Credentials of your new postgre database

- Add the url to your postgressql database:

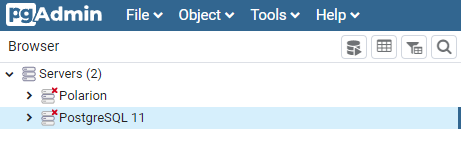
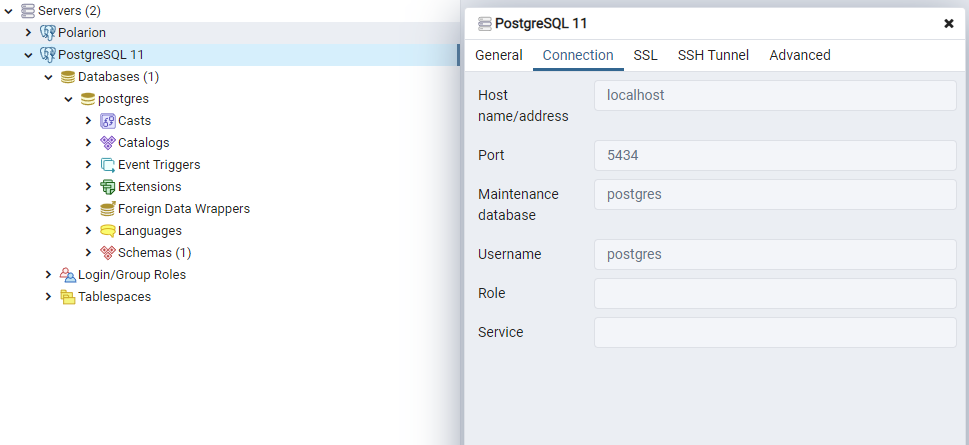
If you’re unsure about the url, then open your pgAdmin 4 and inspect the whole database with a right-click > properites > connection. Combine the adress with the port and then add the name of the individual database (by default here „postgres“ via backslash)
- Set „web.host“, „web.context“ (optional), „web.port“ (optional):
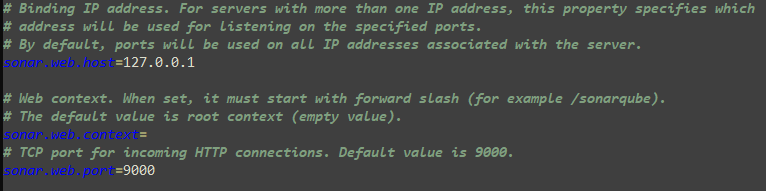
In our default setup we just have to watch out, that our port is not taken by any other application. I also recommend to leave the context empty, because otherwise you would have to access the SonarQube interface with port + the context. E.g. „127.0.0.1:9000/sonarqube“ which seems just unnecessary to me.
And now we go to [SONARQUBE_PATH]\bin and start the „StartSonar.bat“ with administrative rights. This will set up the database scheme and start the SonarQube web server.
Jenkins-SonarQube Integration Setup
We know of two possibilities to trigger now the SonarScanner via Jenkins: CMD or SonarQube plugin.
Let’s try the SonarQube plugin for Jenkins, as this provides a better overview in the build configuration. So go to „Manage Jenkisn > Manage Plugins“ and install „SonarQube Scanner for Jenkins“
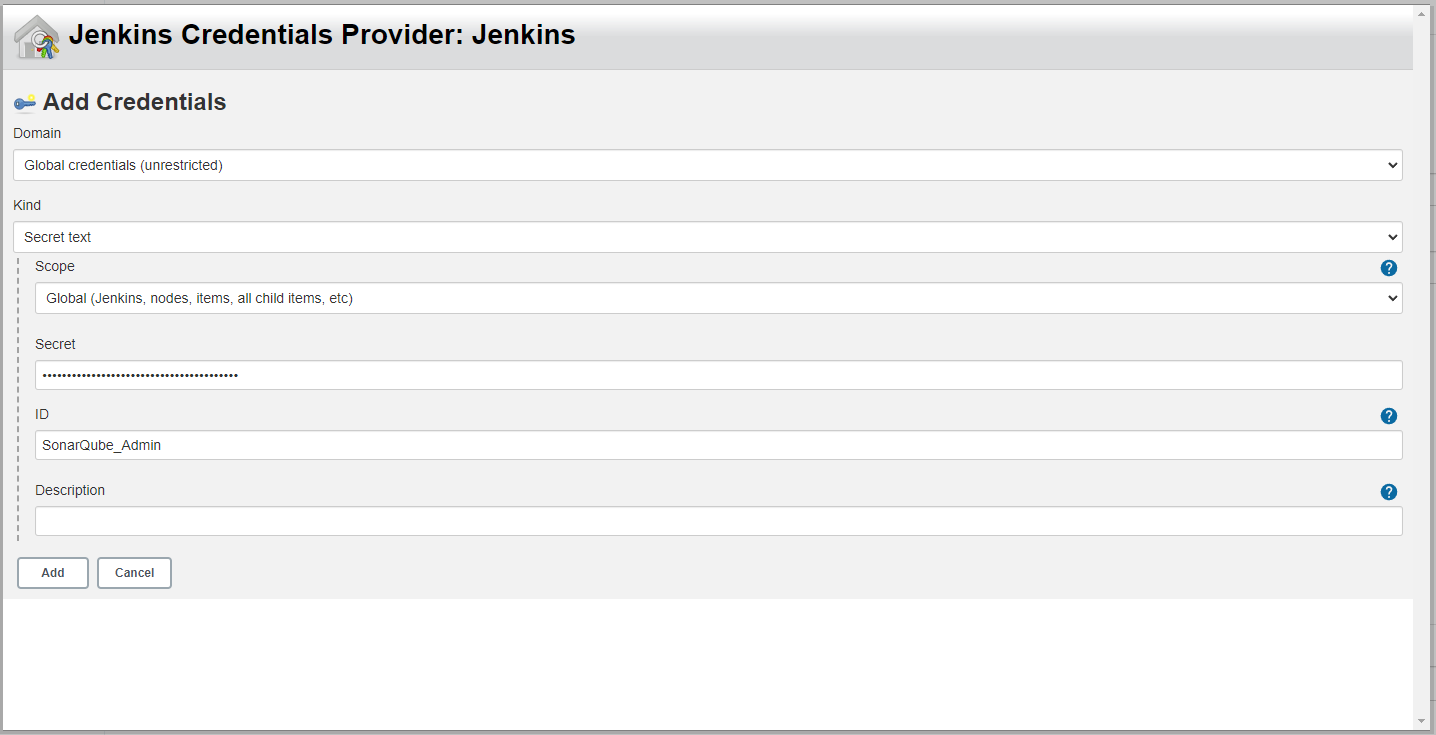
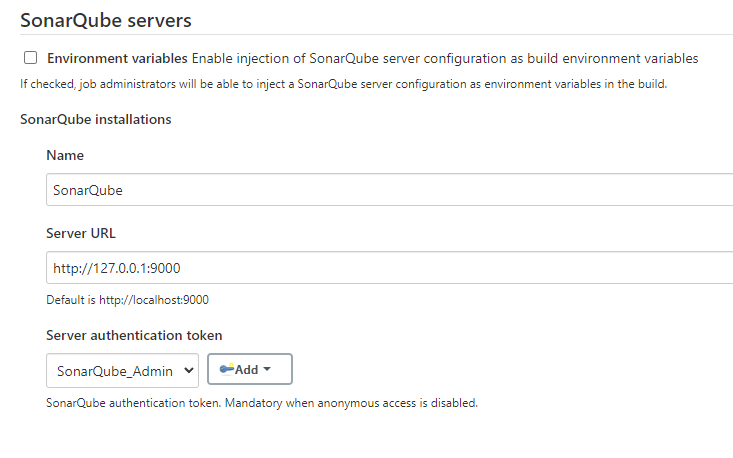
After installation we find a new section in „Manage Jenkins > Configure System“ called „SonarQube Server“. Here we add our SonarQube url and credentials. As Credentials we use type „Secret Text“ and create a token on SonarQube side under „User > My Account > Security“.
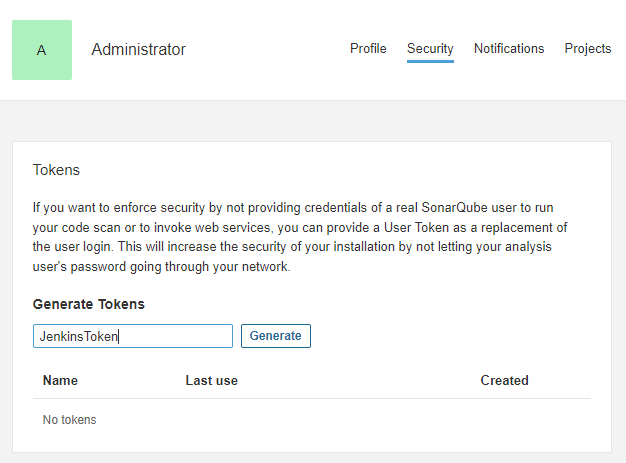
The generated token will be entered on jenkins side into „Secret“.
This way we have connected the two systems:
Build Configuration for Sonar-Scanner
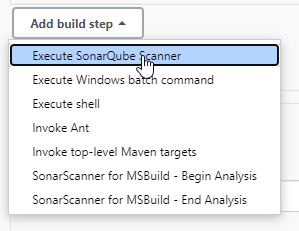
To scan the workflow scripts now with the sonar scanner, we add an additional build step:
For a sonar scanner to work, we have to provide a sonar-project.properties file. Preferably in the workspace of the Jenkins build. My Jenkins workspace can be found here: „C:\ProgramData\Jenkins.jenkins\workspace\ExampleWorkflowFunctionBuild“
In this space I’ll create a sonar-project.properties file with following content:
sonar.projectKey=Example-Workflows
sonar.projectName=Example Workflows
sonar.sourceEncoding=UTF-8
sonar.sources=./ExampleWorkflows
sonar.exclusions=./ExampleWorkflows/.svn
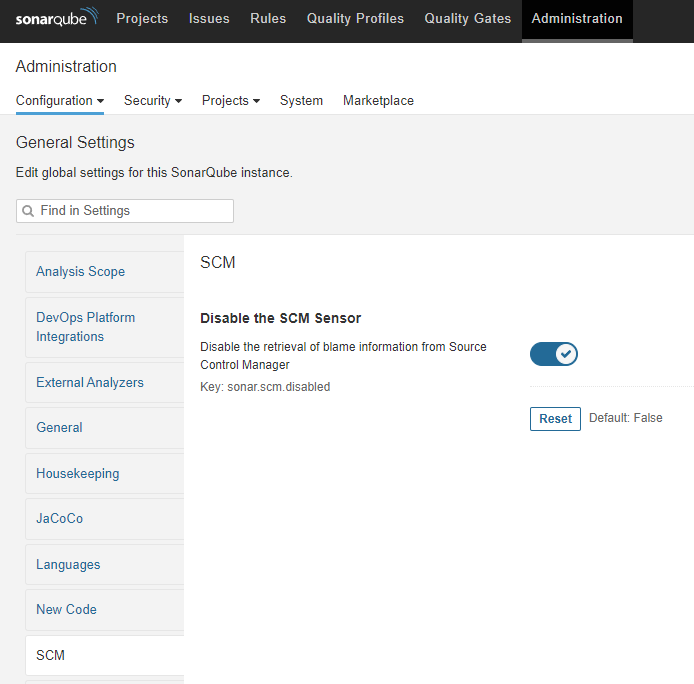
I also had to active the option „Disable the SCM Sensor“ in SonarQube, because otherwise it tries to access Subversion as soon as it sees .svn folders:
You might have to add additional properties depending on what you want to scan. Check out: SonarScanner and Narrowing the Focus.
Without any additional details you’re now able to trigger the build in Polarion and it will be scanned by SonarQube:
